A step-by-step guide to set up your own NFT minting site using our API
Create a NFT mint site in less than 30 minutes
Crossmint provides a solution suite that allows NFT creators a hassle-free method of minting and sending NFTs to collectors without needing to deploy smart contracts, worry about errors, or pay transaction fees. Furthermore, the solution allows for integrating a simple drop system to email addresses and cross-chain payment options into the minting process.
This guide will cover all steps needed to set up a developer account at Crossmint, create a Minting API project, and add the API to your mint site to use the email provided by the user to mint an NFT.

Creating a Crossmint Developer Account
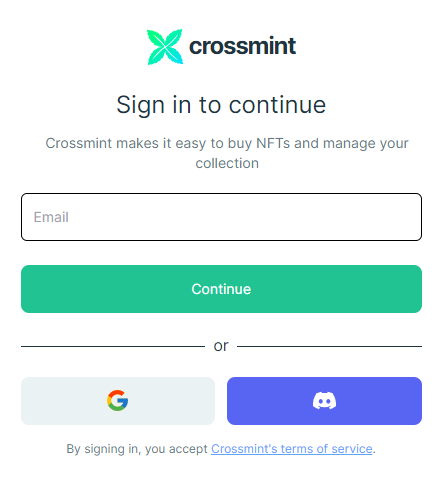
The first step is to create your account at Crossmint to get access to the API. The website has two versions: One for production (crossmint.io) and another for testing (staging.crossmint.io). In this guide, we’ll access the testing (staging) site. It is a good practice to verify everything is working before going to the production environment, and all the steps are similar on the production site. Let’s click on Dev Console to access the login page on the website.
Choose your preferred method to create your account.
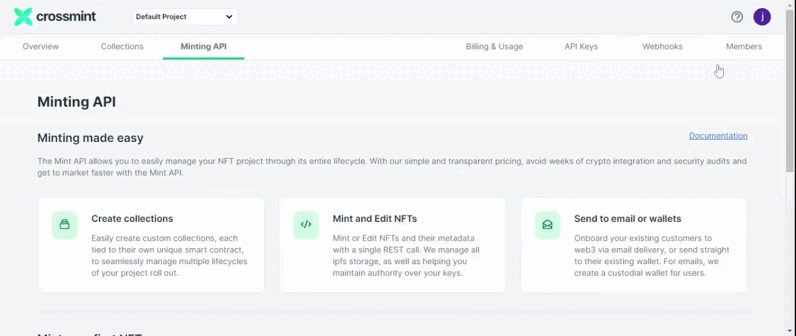
After this page, you will access the dashboard. We are looking for the “Minting API” Section.
Staging Website Dashboard
In the “Minting API Section,” go to API & Webhooks.
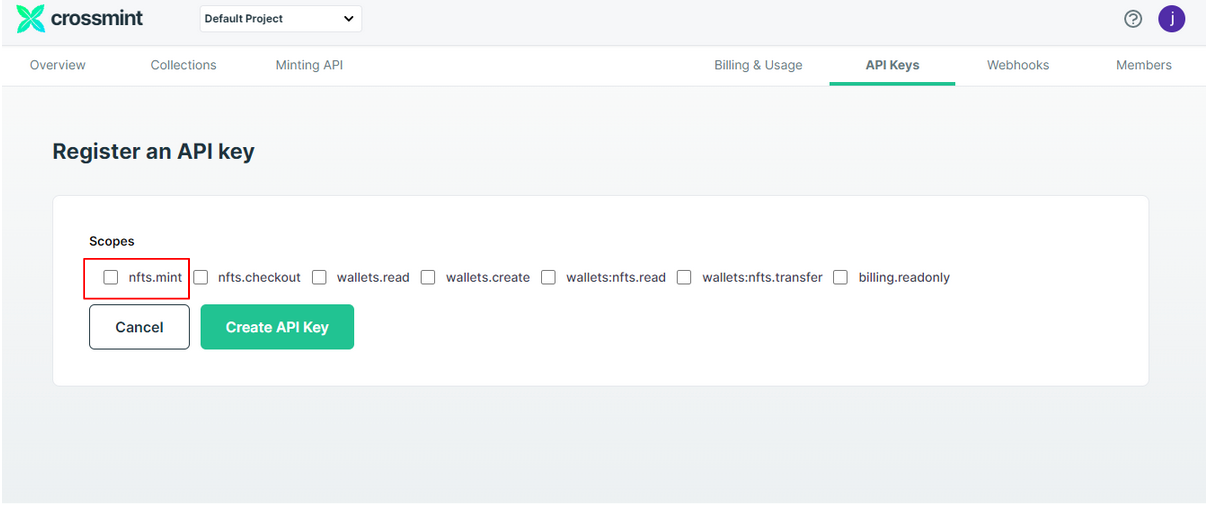
This will send you to the page where you can create the Minting API. There, click on the “New API Key” button.
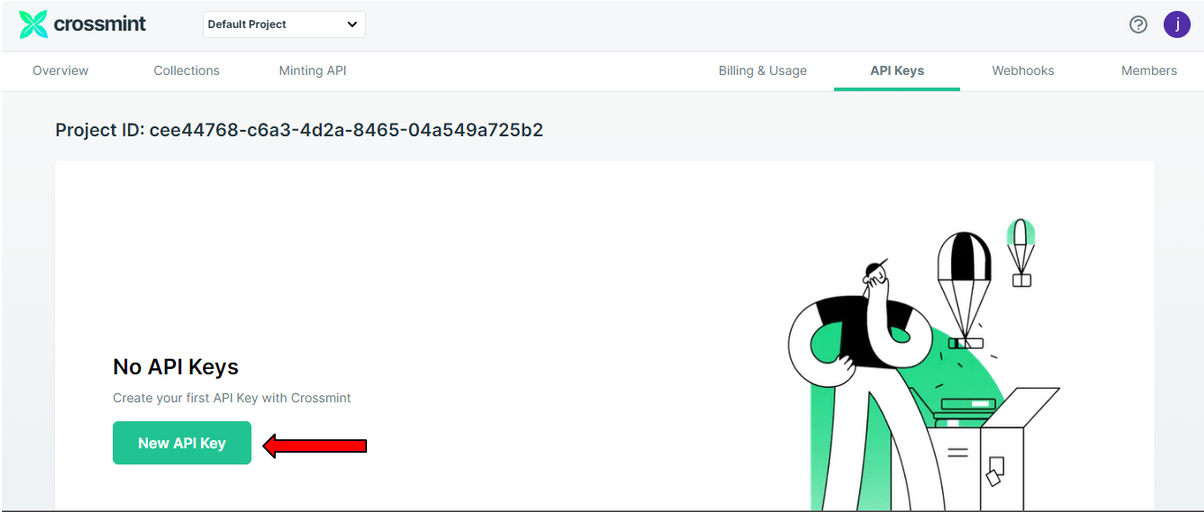
This will open a new page where you can select different types of scopes for your API keys. For this guide, choose “nfts.mint” and click “Create API Key.”
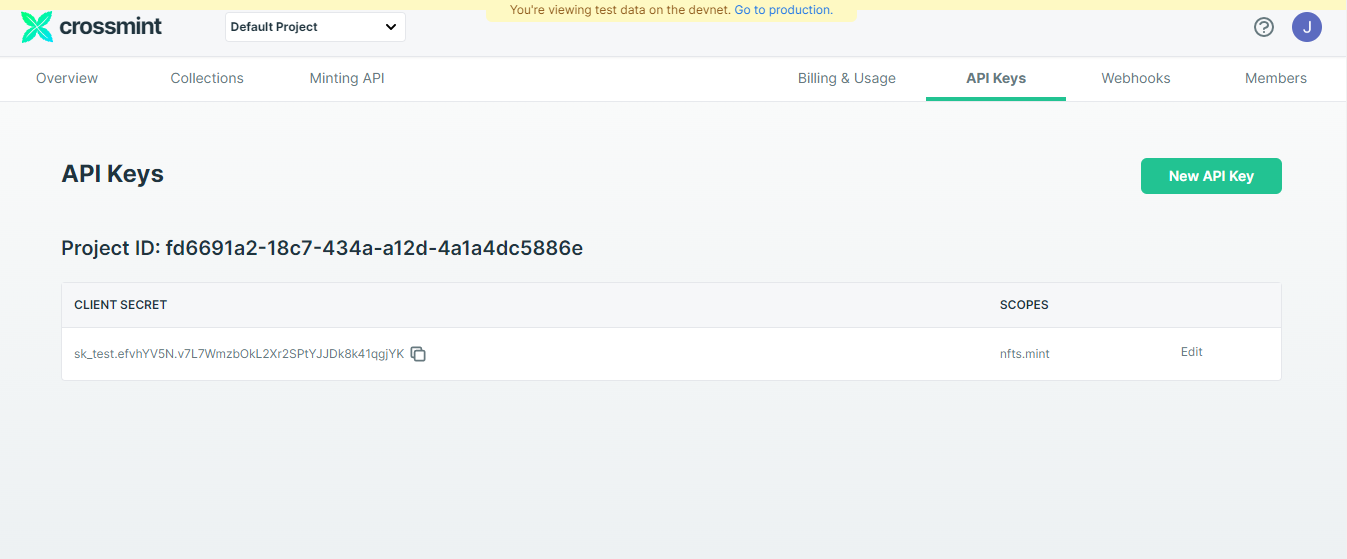
As a result, a new client secret is created. It starts with “sk_test” when generated by the staging website and “sk_live” when generated on the production website.
For the scope of this guide, this is the data needed. Please refer to the documentation for more information about the other sections on the website.
Choosing the Minting API code
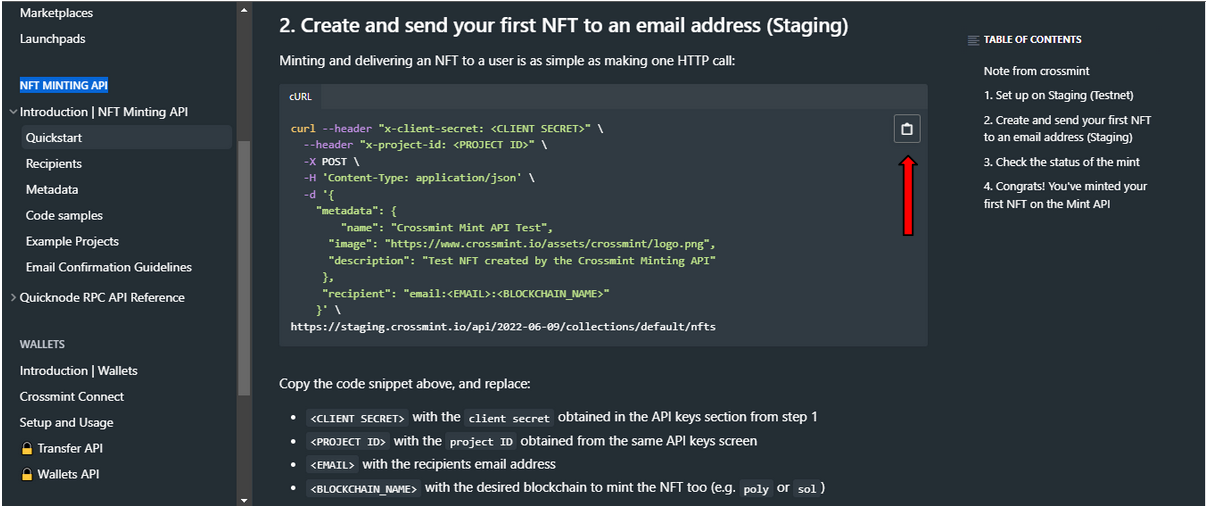
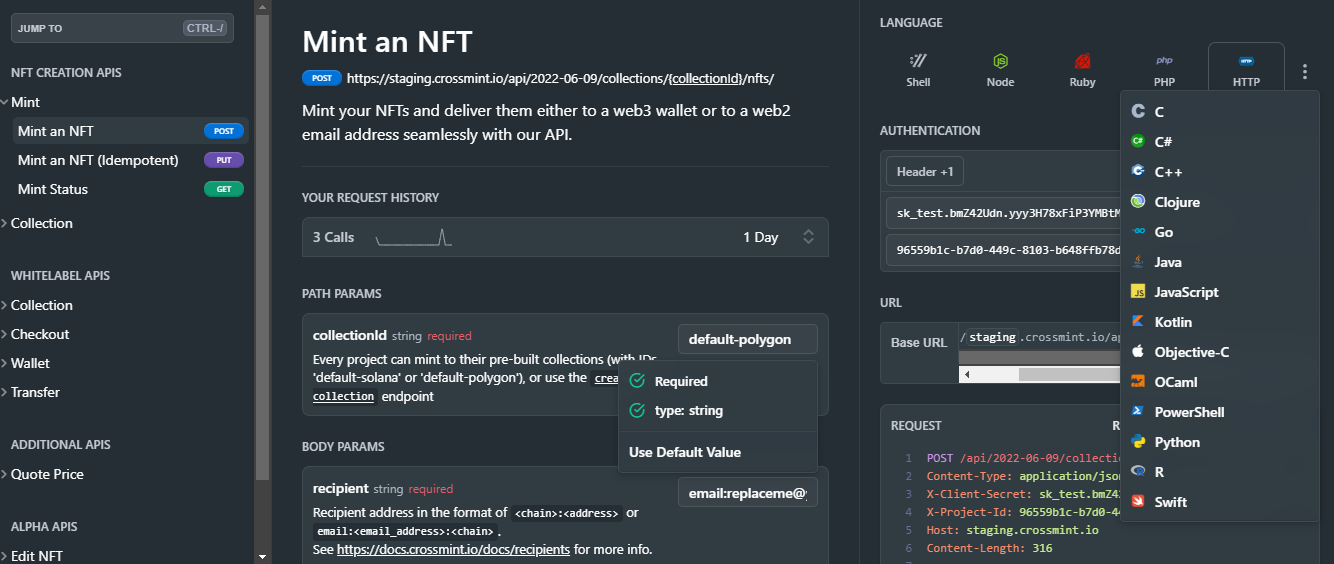
Save the “Project ID” and “Client Secret,” as these values are needed when setting up the API. Then, to get the API code, go to the NFT Minting API section of the documentation. You’ll see some of the steps covered here, but now we are interested in the API code. You can copy it from this page.
Another option is to go to the API reference page and select an option from the several programming languages available:
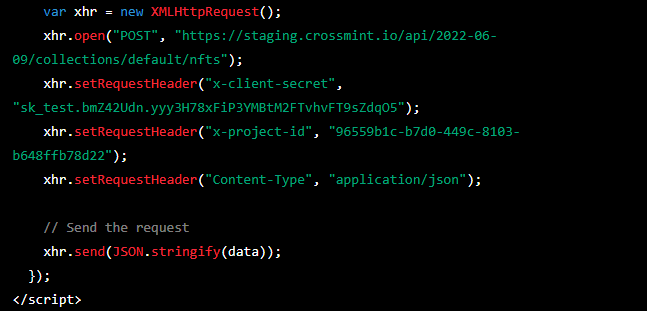
With the chosen code, now it is time to replace some placeholders with your data:
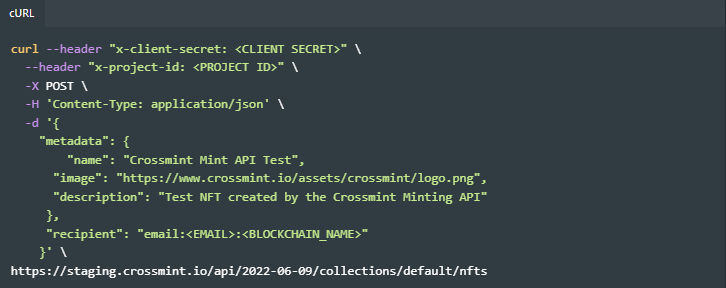
The API has a header (where the client secret and project ID are) and a body containing the NFT metadata and recipient.
Fields that we will change:
<CLIENT SECRET>: Use the value generated at the Dev Console
<PROJECT ID>: Use the value generated at the Dev Console
<EMAIL>: Field that will receive the email inserted by the user
<BLOCKCHAIN_NAME>: Blockchain where the NFT will be minted (current options are Solana and Polygon).
Now it is time to add this API to a webpage.
Minting Website
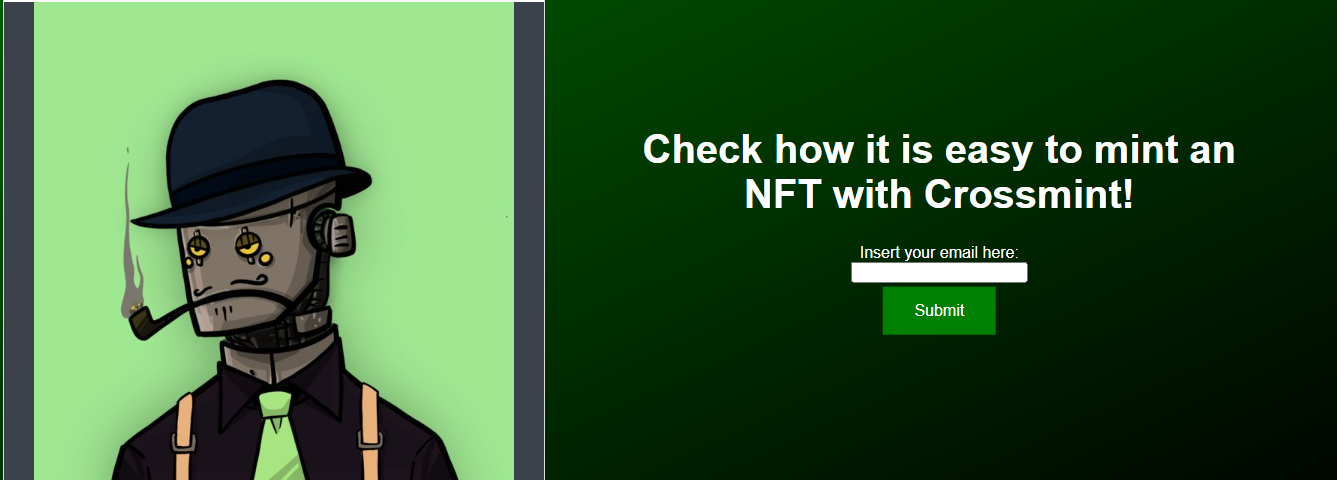
In this guide, we want to have a field in a website where the user will input an email. We will use this information to mint an NFT and create a Crossmint wallet, where the user can view it. Our minting website looks like this:
There are several ways to send the value the user entered (the e-mail) to the “recipient” string inside the API. This was the approach selected in our example:
- Create an input text field;
- Combine it with a “submit” button;
- Create a variable to retrieve the information;
- Create an event listener to send the information to the variable
- Define an object that will contain the API body values (metadata + recipient) - Optional
- Send the value of this variable to the API.
Below we have the code used to create the input field and the button:

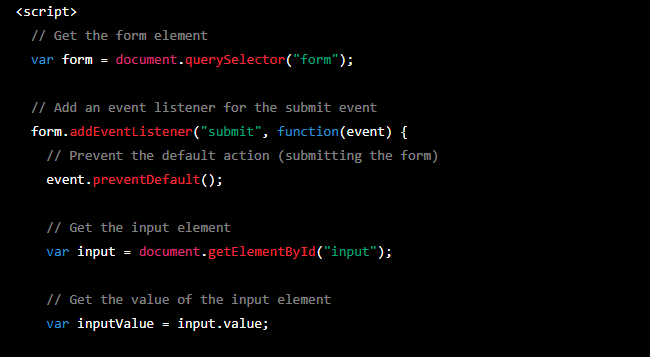
The next piece of code shows the variable and the event listener. We used it to send the information to the variable after clicking on the “Submit” button.
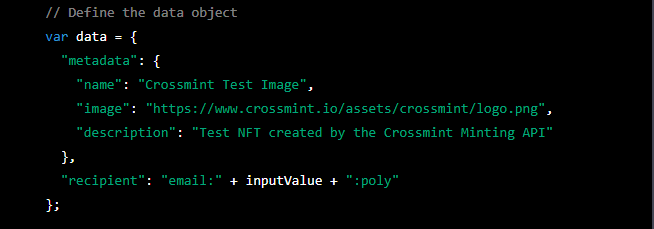
Here, we define the object and insert the variable “inputValue” in the recipient string. This will write the user’s email address into it.
Now we have the API code with the information needed to mint the NFT and create a Crossmint account for the user.
Accessing the NFT in your Crossmint Wallet
Time to go to the website and check the minted NFT! Go to staging.crossmint.com and click on the “My Wallet” button.

After creating your user, you will enter your account page, where all your NFTs are accessible.
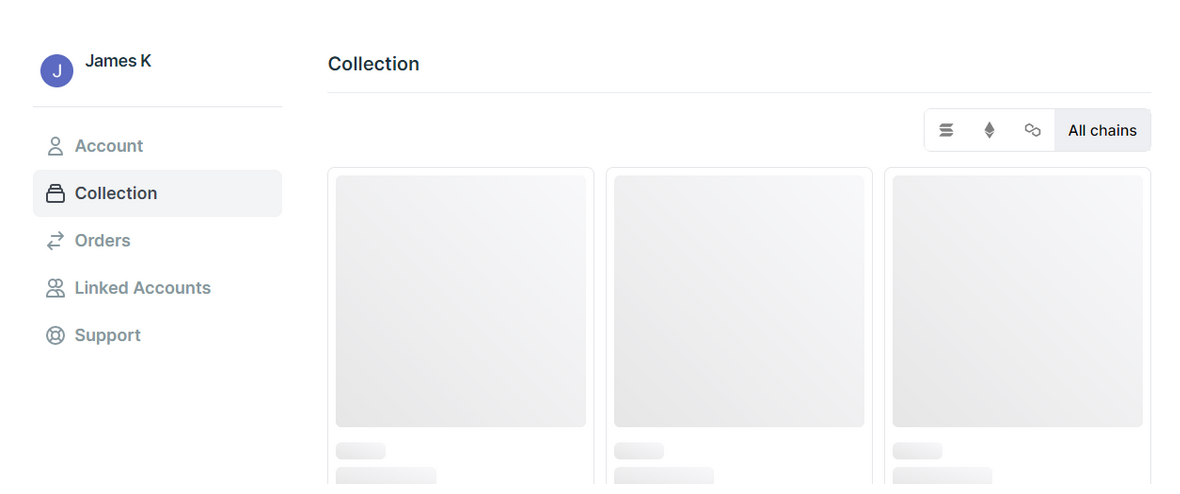
If you click on one specific NFT, you can access the detail page.

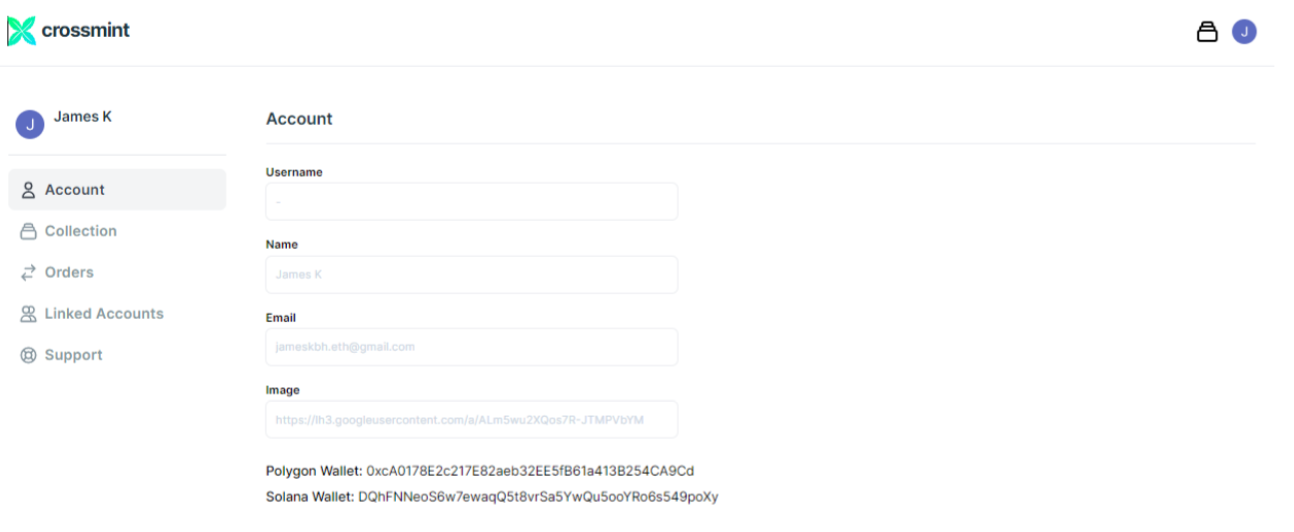
When clicking “Account,” you can see the associated blockchain addresses. With it, you can access a blockchain explorer and check all the NFT mint transactions!
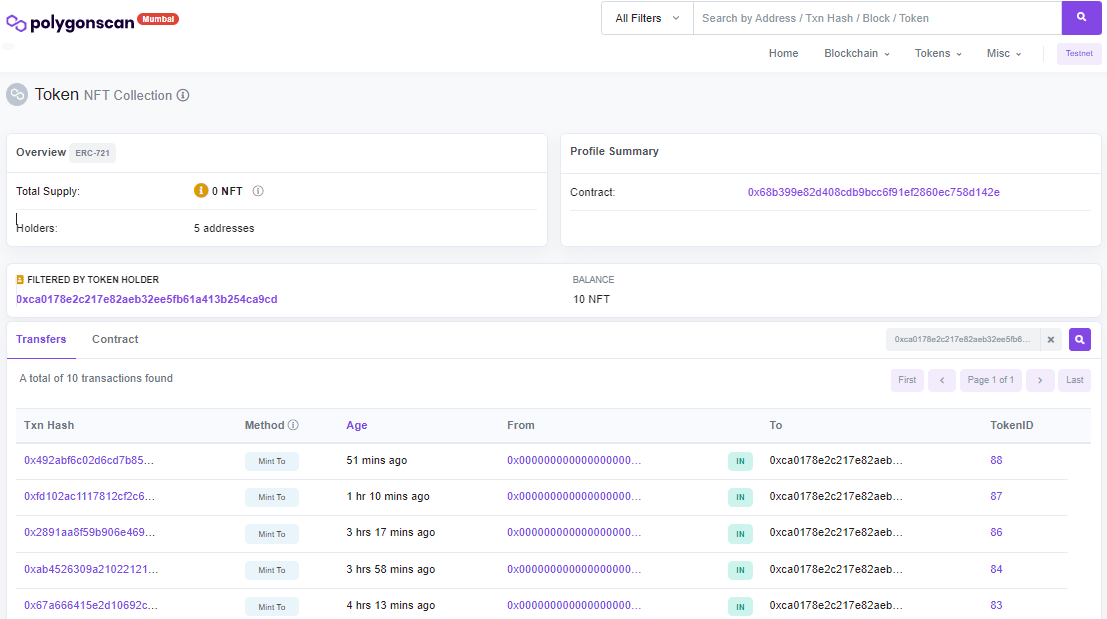
For the examples in this guide, we used the Mumbai Polygon testnet, and you can access its block explorer here. Below we have the address page showing all NFT transactions sent to it.
TL;DR - What we have done in this guide
First, we created a developer account to generate the keys to use in the Crossmint Minting API. This solution enables creators to mint NFTs without deploying a smart contract and collectors to claim theirs without having a blockchain address.
Then, we integrated the API into a simple NFT Minting page.
Finally, we used the email the user gave us to mint the NFT and create a Crossmint Wallet. The user can find all information about the NFT, including the associated blockchain address, on this page.