


Automatically reward your new subscribers by sending them an NFT when they sign up for your newsletter. With Crossmint, Zapier, and Mailchimp, in just a few clicks you can engage with your audience in a deeper way than ever before.
Send NFTs to your email newsletter subscribers
As a marketer or business owner, you're always looking for ways to engage your audience and keep them coming back for more. One of the most effective ways to do this is through email marketing, and Mailchimp is one of the most popular platforms for this. But what if you could take your email marketing to the next level and offer your subscribers something truly unique and valuable – like a custom NFT? That's where Crossmint comes in.
At Crossmint, we make it easy to create, mint, and manage NFTs. You can easily use Crossmint to mint custom NFTs and integrate them into your marketing campaigns. In this tutorial, we'll show you how to use Crossmint to mint an NFT gift for every new subscriber on your Mailchimp newsletter.
Step 1: Create a Crossmint account
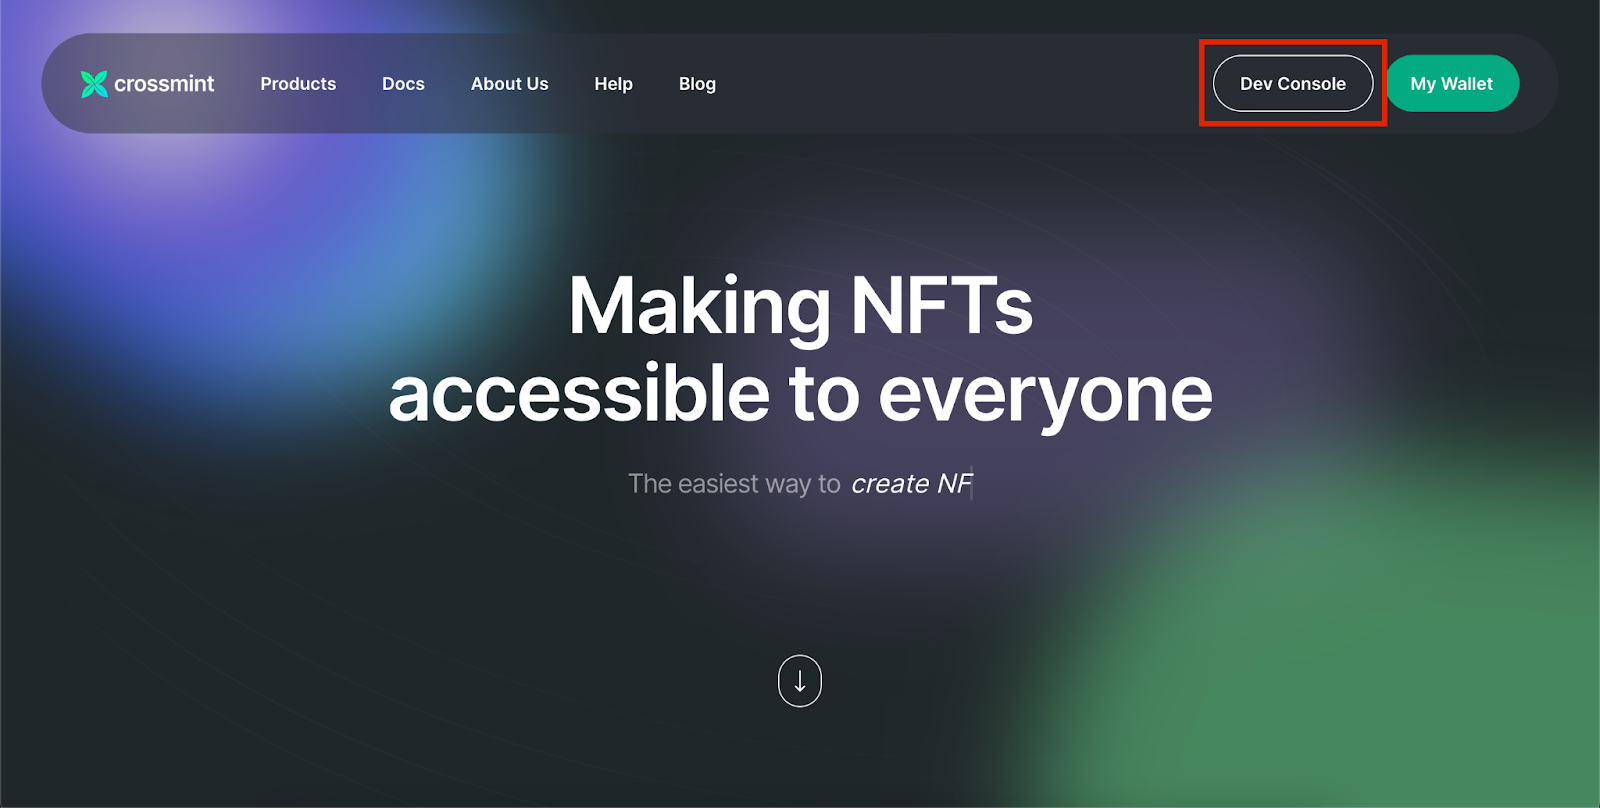
The first step is to create a Crossmint account. Go to the Crossmint website and click on "Dev Console" in the top right corner. Log in using your email, Google or Discord account. Once you've created your account, login and navigate to the "API Keys" section.
Step 2: Get your Crossmint API key
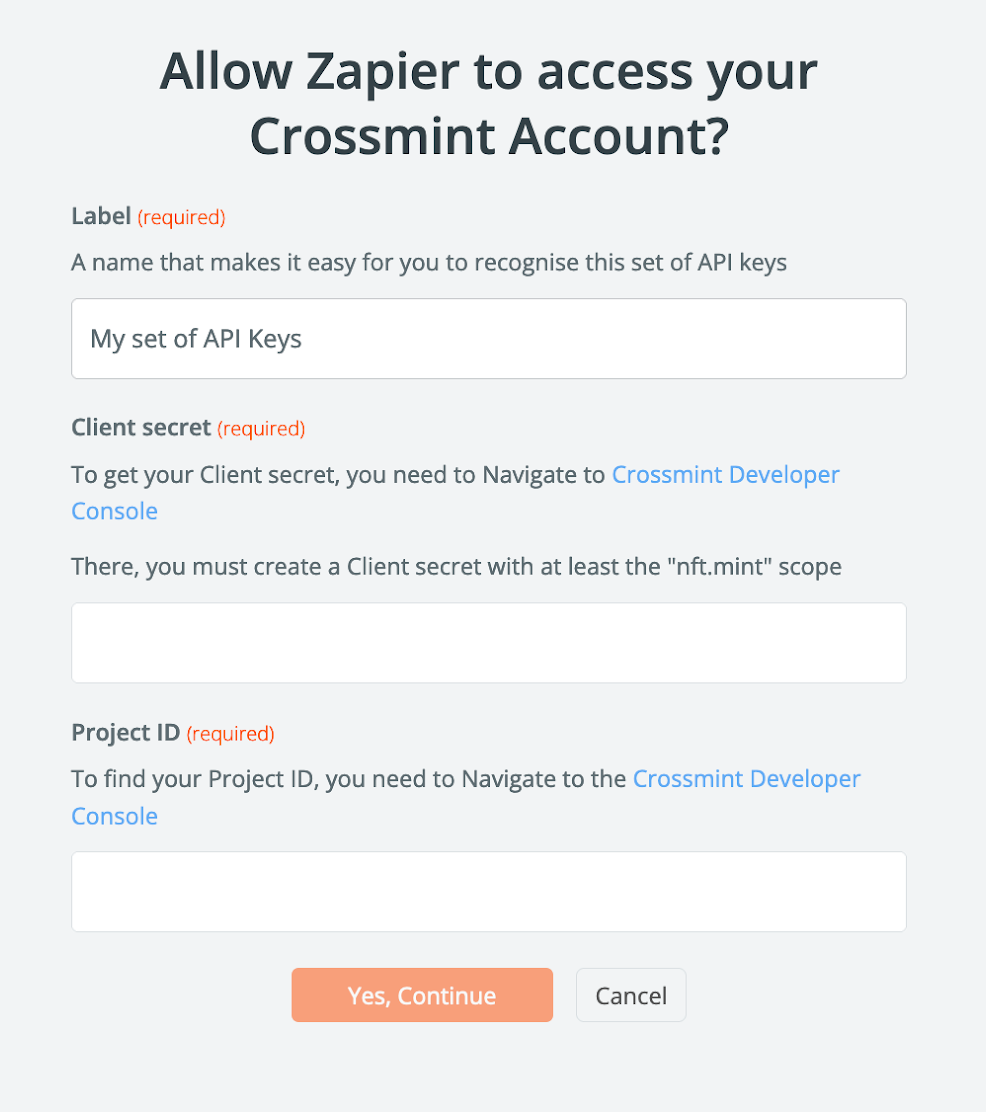
Next, you'll need to get your Crossmint API key. This key will allow you to access the Crossmint Minting API and mint your NFTs. To get your API key, click on "New API Key" in the "API Keys" section. This will bring up a screen where you can generate your key. Simply select the "nfts.mint" box and then click "Create API Key" and your key will be displayed. Copy the "Client Secret" alongside your "Project ID" and keep it safe, as you'll need it for the next step.

Step 3: Connect Mailchimp and Crossmint
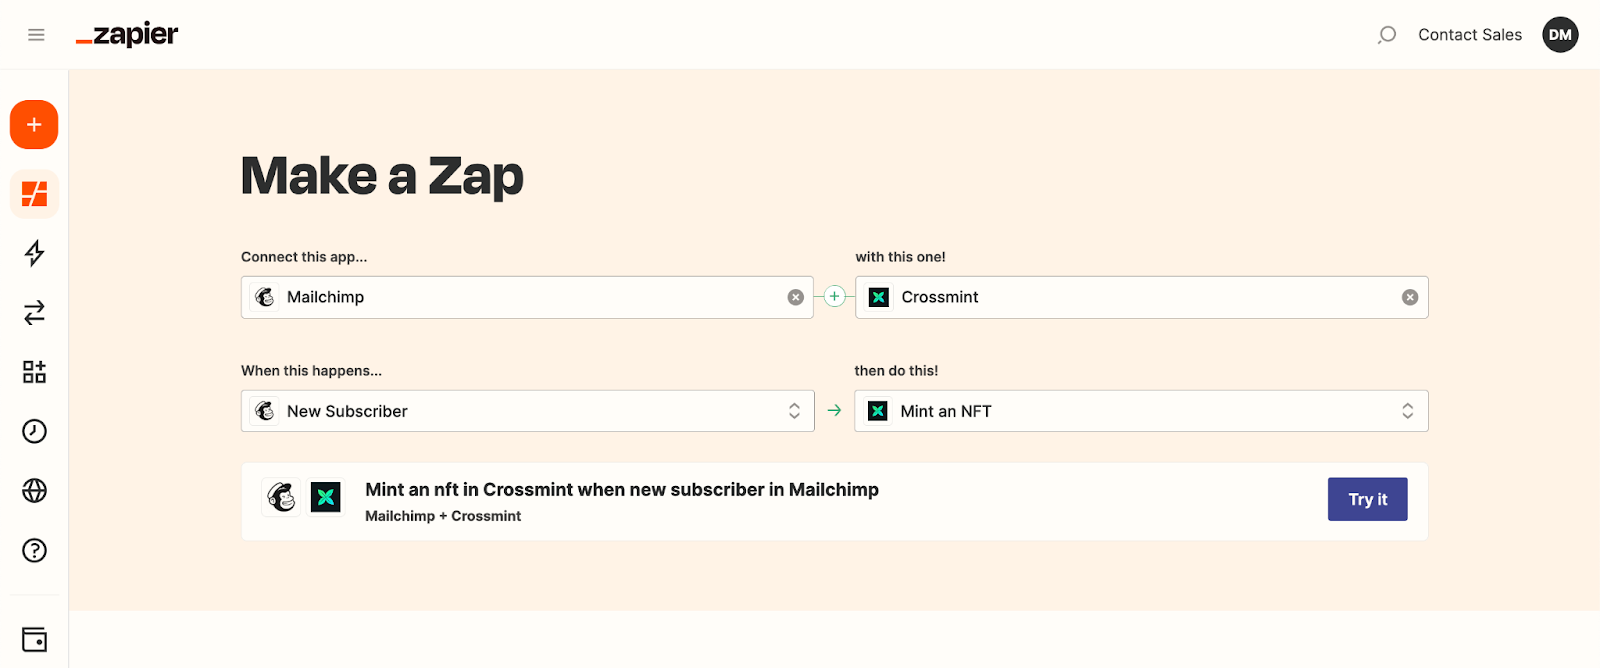
Now that you have your Crossmint API key, it's time to connect Mailchimp and Crossmint. To do this, you'll need to use Zapier. Zapier allows you to connect Crossmint with +5,000 apps like Mailchimp without using any code. If you don't already have a Zapier account, sign up for one now.
Once you've logged into Zapier, create a new "Zap" and choose Mailchimp as the trigger app. Select the "New Subscriber" trigger and connect your Mailchimp account. Then, choose Crossmint as the action app and select the "Mint an NFT" action. Connect your Crossmint account by entering your Crossmint "Client Secret" and "Project ID".
Step 4: Set up the NFT details
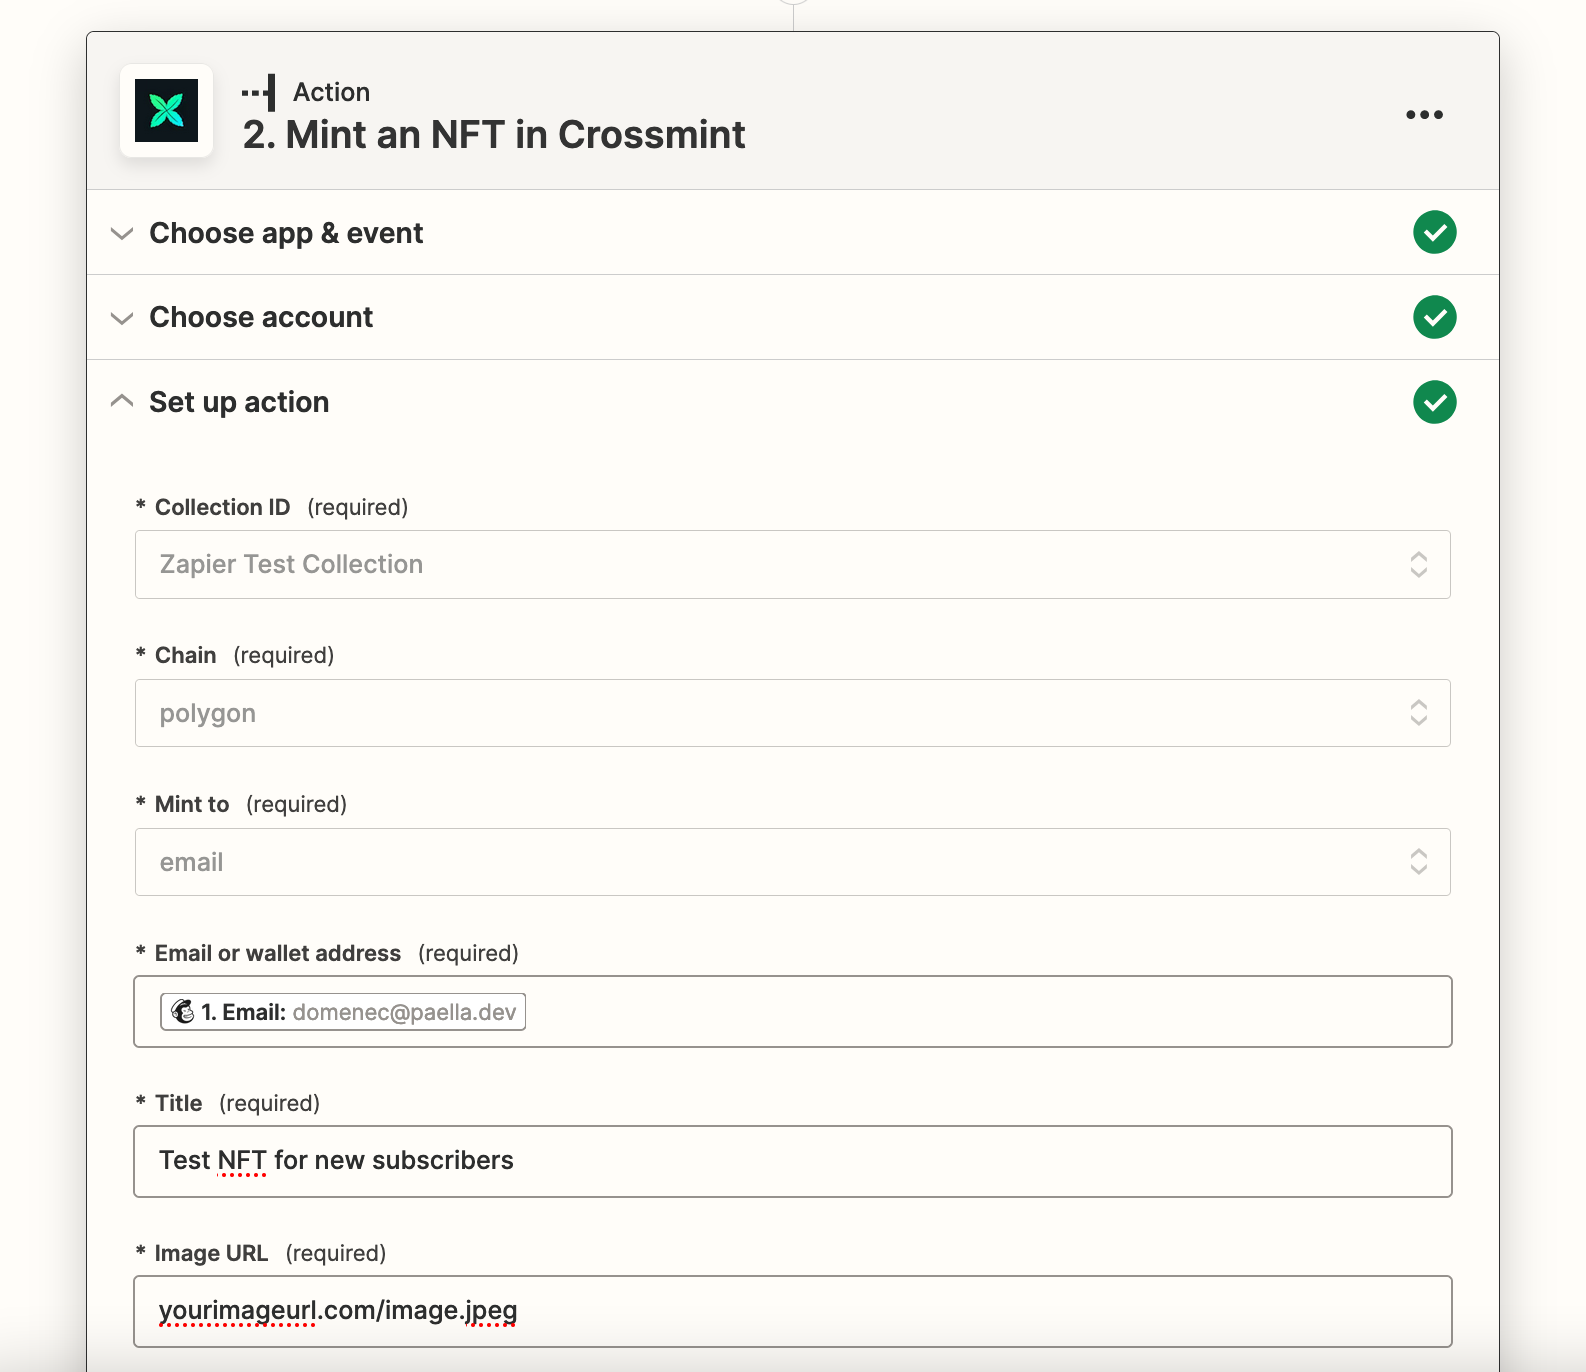
Now that your Zap is set up, it's time to set up the details for your NFT. In the "Mint an NFT" action, you'll need to specify the NFT properties, such as the image, the name, and the description. You will need to set the email of the recipient as the email of your new Mailchimp subscriber (see image for reference)
Step 5: Test and activate your Zap
Before you activate your Zap, it's a good idea to test it first to make sure everything is working correctly. To do this, simply click "Test & Continue" and Zapier will run a test to see if the integration is working. If everything is working correctly, you should see a success message.
Once you've tested your Zap, activate it and start using it! From now on, every time you add a new subscriber to your Mailchimp newsletter, Zapier will automatically mint a custom NFT for them. Your subscribers will receive their NFT to their Crossmint wallet, which they can access using their email address from our website, in order to view, collect, and trade them on the blockchain.

In conclusion, integrating the Crossmint Minting API with Mailchimp is a great way to take your email marketing to the next level and offer your subscribers something fresh, cool and innovative!
Learn more about our Minting API and how you can integrate it into your application on our docs site!


