


Automatically send NFTs with Zapier and Crossmint
Crossmint x Zapier
Are you ready to dive into the exciting world of NFTs? Let's go!
Crossmint allows you to easily and quickly mint your own NFTs using a simple and intuitive interface. But now it’s easier than ever. We integrated with Zapier, so you can now connect Crossmint to over 5,000 other apps like Twitter, Mailchimp, or Shopify, without any coding or technical knowledge.
Use cases are limitless! For example:
- Airdrop an NFT when someone interacts with you on Twitter (we tried it and we got ~800 new followers within the hour!)
- Send an NFT when you receive a purchase order on Stripe
- Airdrop an NFT when someone completes a Typeform or buys your ticket on Eventbrite
- Mint legal contracts as NFTs upon signature on Docusign
... and much more 🥷🏼
In this tutorial, we'll show you just how easy it is to use Zapier to integrate with Crossmint and start minting your own NFTs in no time.
Prerequisites
Before we get started, make sure you have the following:
- A Crossmint account
- A Zapier account
- Some credits in your Crossmint account
- A desire to create your own NFTs!
Step 1: Create a Crossmint developer account
To get started, the first thing you'll need to do is to register as a developer in the Crossmint developer console.
Go to crossmint.com/console, sign in, and accept the dialog to continue.
Step 2: Create a set of API Keys
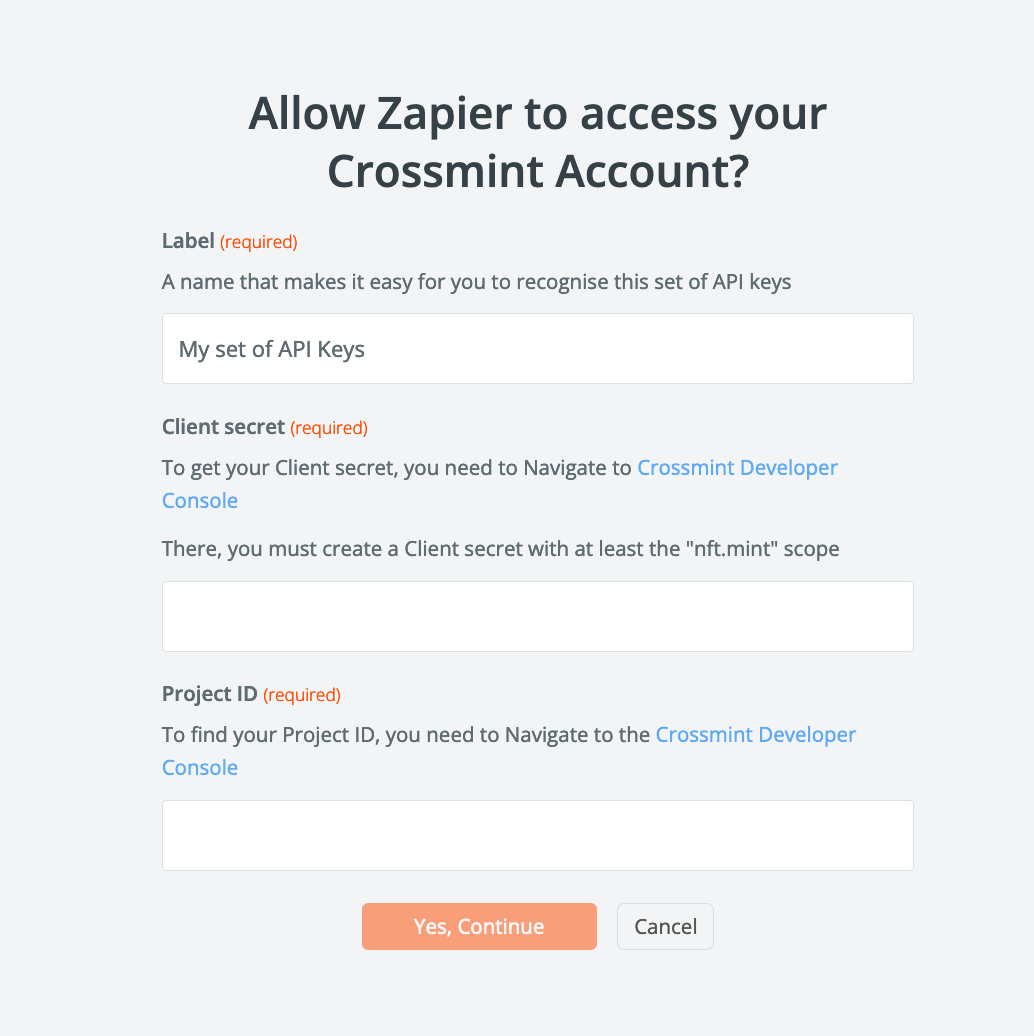
Once you land on the dashboard, the next step is to create an API key: a secret credential that allows you to make calls against the minting API.
To do so, go to the "API Keys" page, and click on "New API Key". Then, on the dialog that opens, mark the checkbox for the scope nfts.mint, and then save it.
Finally, from back at the API Keys page, copy your Project ID and Client Secret. We will need them later.

Step 3: Add some credits to your Crossmint account
To be able to mint NFTs using Crossmint, you will first need to add credits to your account.
To do this, navigate to the billing section of the developer console and add a payment method.
Once you have a payment method set up, you can top up your account with the desired amount of credits.
Keep in mind that each NFT you mint on Crossmint costs 5 credits, so make sure you have enough credits in your account to cover the cost of your NFT creations.
Once you have credits in your account, you can start minting!
Step 4: Create a New Zap
Now it's time to create a new Zap in Zapier. Simply click on "Make a Zap" and give your new Zap a name.
Step 5: Set up the Trigger
Next, select the app you want to use as the trigger. With Zapier, you can choose from over 5,000 apps, including Twitter, Mailchimp, and Shopify. Once you've selected your trigger app, follow the instructions to set up the trigger event.
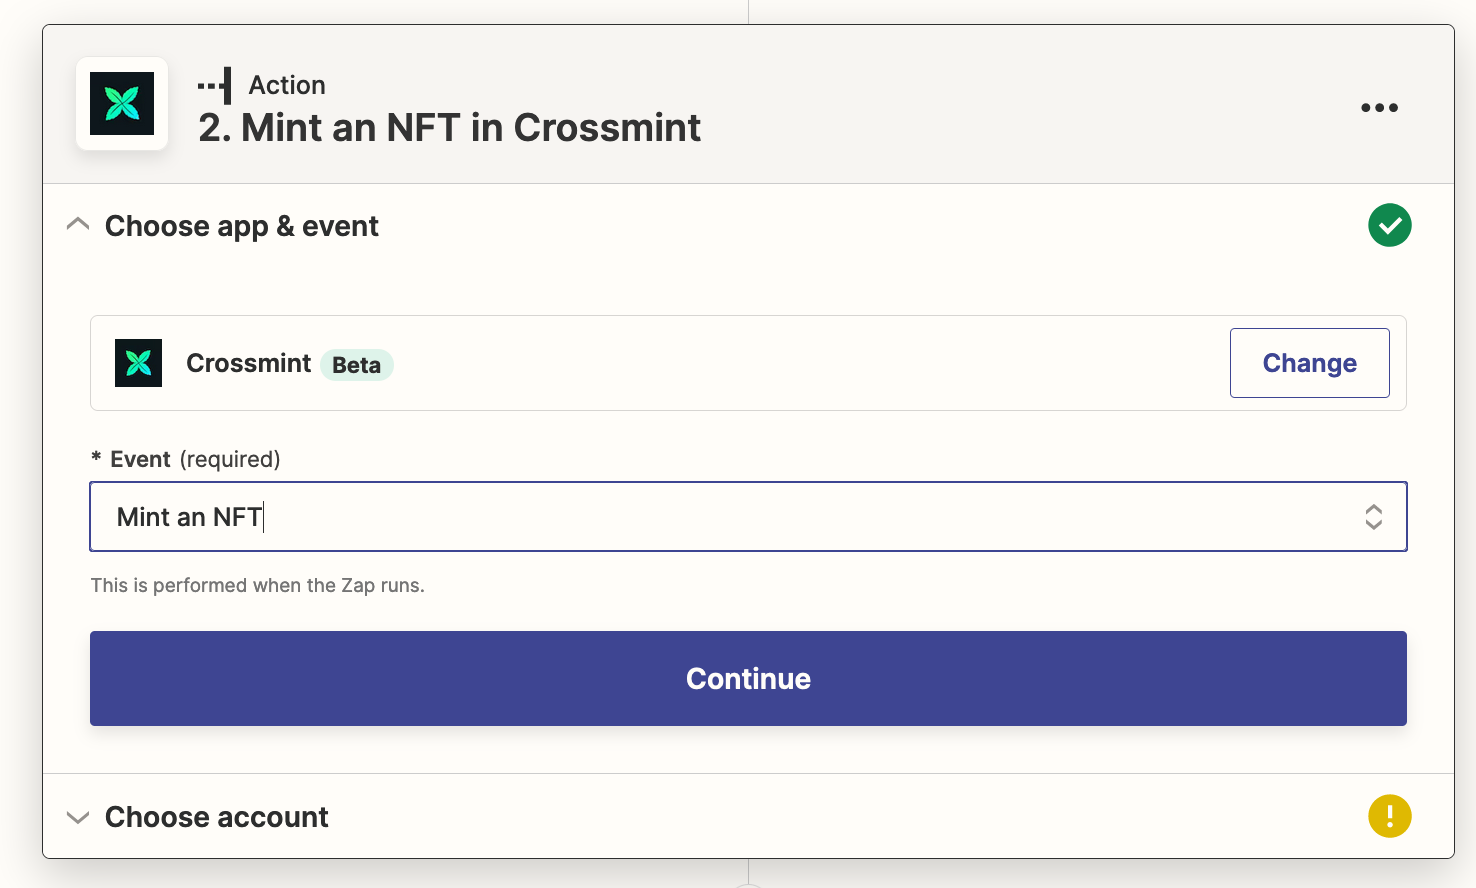
Step 6: Set up the Action
After setting up the trigger, it's time to set up the action. Select "Crossmint" as the action app and choose "Mint NFT" as the action event. Follow the instructions to authenticate with your Crossmint account using the API keys you generated in Step 2. Then, enter the details of the NFT you want to mint, such as its name, description, and image. Don't forget to make sure you have enough credits in your Crossmint account to cover the cost of minting each NFT.
Step 7: Test the Zap
Before turning on your Zap, it's always a good idea to test it to make sure everything is working correctly. Follow the instructions to test the Zap, and if everything is working as expected, you should see a new NFT in your Crossmint account (if you minted it to your email address) or your non custodial wallet (if you minted directly to a wallet address).
Step 8: Turn on the Zap
Finally, if everything is working correctly, turn on your Zap and start minting NFTs automatically whenever the trigger event occurs.
Conclusion
Congratulations, you've successfully integrated Crossmint with Zapier and can now create your own NFTs easily and automatically! With over 5000 apps to choose from, you can easily connect Crossmint with your favorite tools and start minting NFTs in no time.
And with no coding or technical knowledge required, it's never been easier to get started with NFTs. So what are you waiting for? Start minting your own unique digital assets today with Crossmint and Zapier!
Here are some cool examples to get you started:


