In this article, we'll guide you through the process of setting up your NFT drop on the Ethereum blockchain. Then, you'll set up a website so your users can mint directly into their ETH wallets. Finally, we'll add credit card checkout, making minting accessible to many more people.
Learn How to Sell NFTs via Credit Card on Ethereum Blockchain
Ethereum is one of the most popular blockchains that you can use to deploy NFTs. It’s second only to Bitcoin in terms of market capitalization and separates itself with its smart contract functionality.
Ethereum is home to some of the most well-known NFTs drops, including Bored Ape Yacht Club, Crypto Punks, Cool Cats, and many more. But, If you’ve ever tried to purchase an NFT before, you know there are many inconvenient steps involved before you get your Bored Ape. You’re signing up to multiple platforms, setting up your wallet, staying up all night on your computer, and holding your breath until that mint button goes live, hoping you get a good NFT.
Our goal at Crossmint is to make NFTs as accessible and joyful as possible. One of our first products, Crossmint NFT Checkout, allows a web3 developer like you to integrate credit card checkout into your NFT drop website in less than five lines of code.
In this article, we’ll guide you through the process of setting up your NFT drop on the Ethereum blockchain. Then, you’ll set up a website so your users can mint directly into their ETH wallets. Finally, we’ll add credit card checkout, making minting accessible to many more people. Yu’ll learn foundational knowledge about the Ethereum blockchain. In addition, you’ll learn about smart contracts with Solidity, creating a minting website, and how to enable credit card checkout for your NFT drop.
Excited? Let’s jump right in!
What You’ll Build
We’ll build Gradient Shapes, an NFT collection focused on various shapes colored with multiple gradients uploaded to the Rinkeby Ethereum test network.

You’ll be able to mint your Gradient Shape NFT in three ways. First, by directly interacting with the smart contract in your own code, by minting on a website, and finally with Crossmint using test credit card details.

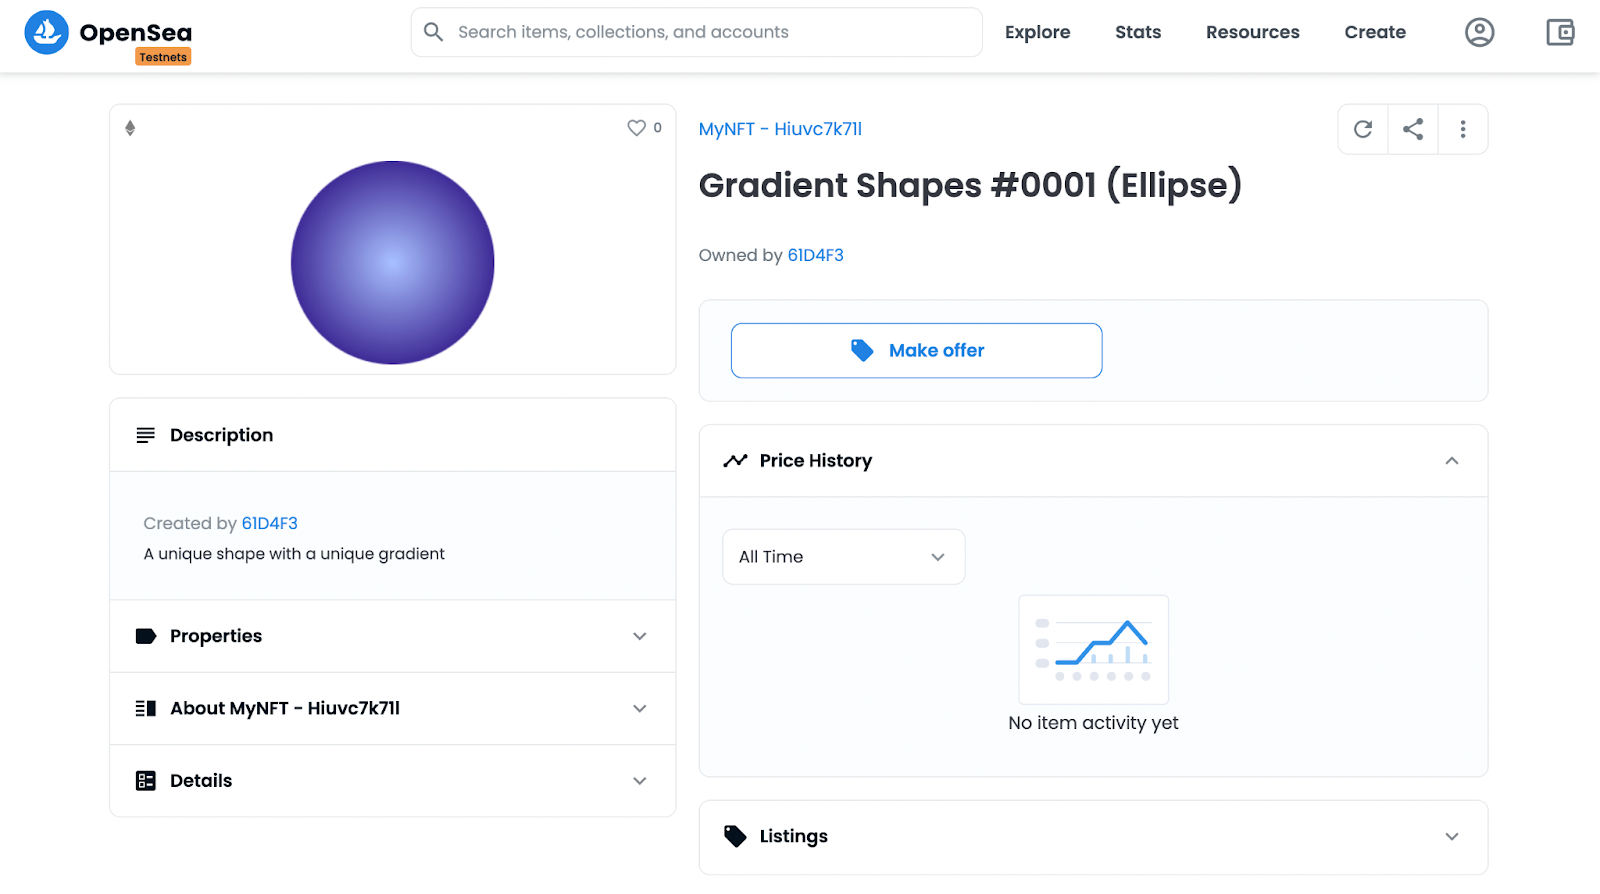
You’ll see details about your NFT on OpenSea and that you own it in your MetaMask wallet.
This is a good first NFT drop to build. We’ll keep things simple and focus on the fundamentals of deploying a drop on Ethereum.
Let’s get started.
Set up your MetaMask wallet
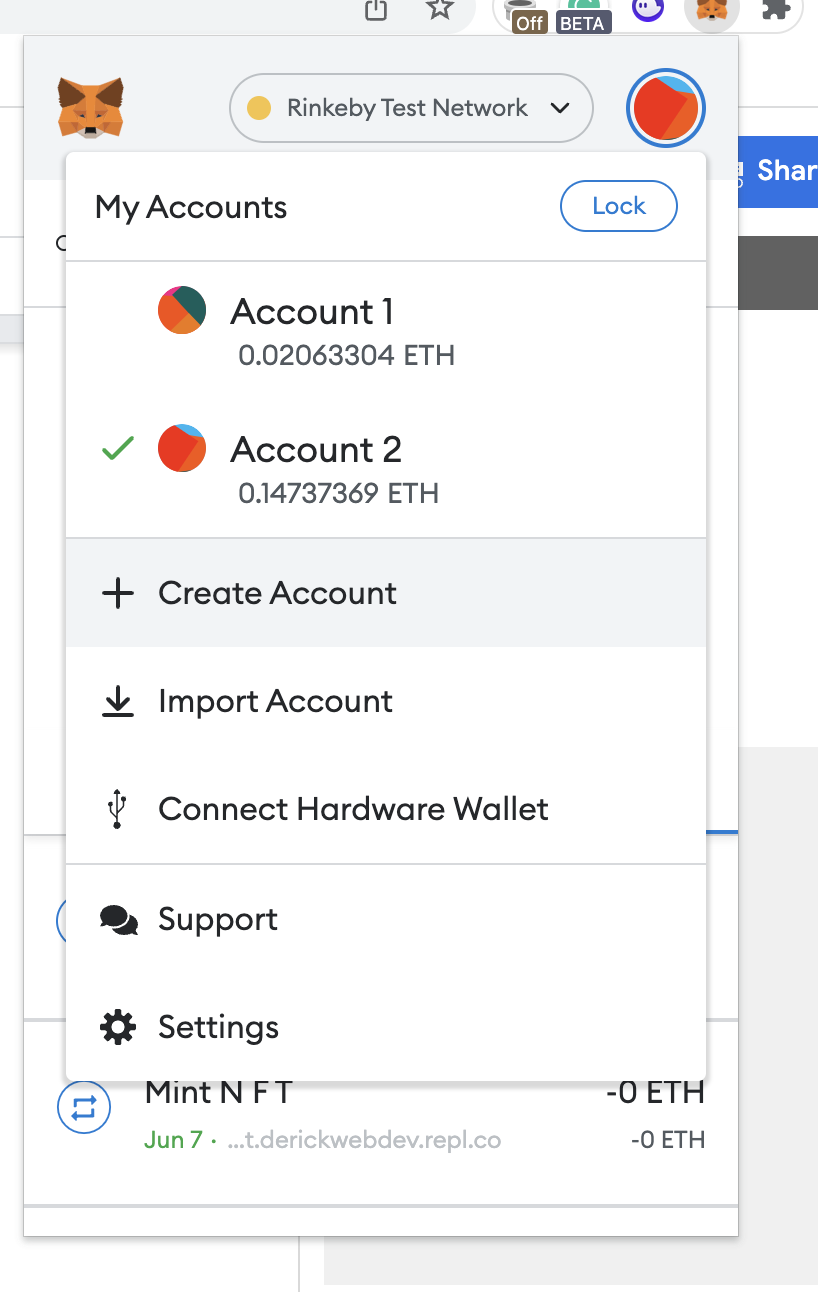
For this guide, install the MetaMask chrome extension and create a brand new wallet.
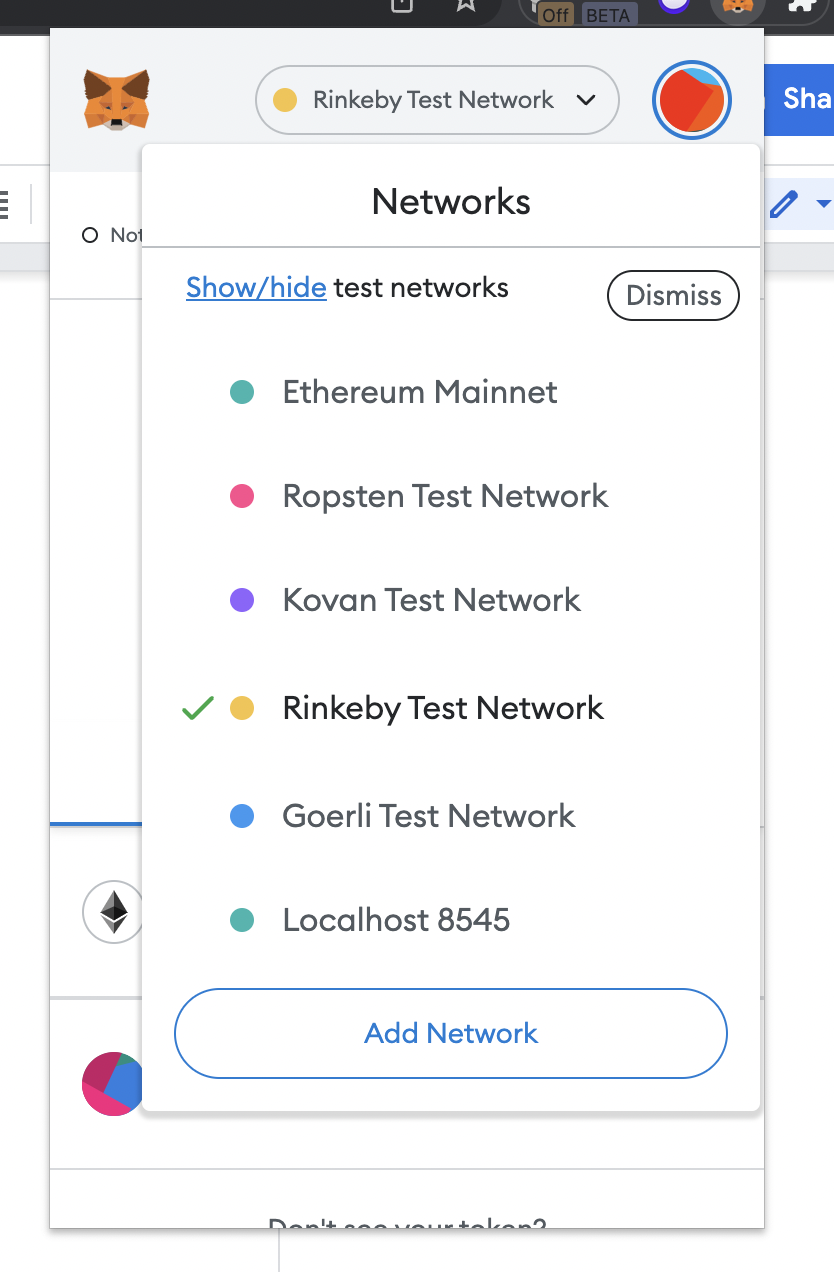
After setting up your Metamask account, switch to the Rinkeby Test Network. We’ll be deploying our NFT here, which doesn’t require real ETH to make transactions.
The next step is getting some test ETH into your account. You can visit the Chainlink Faucet to get some and enter the public address of the new ETH wallet you just created.
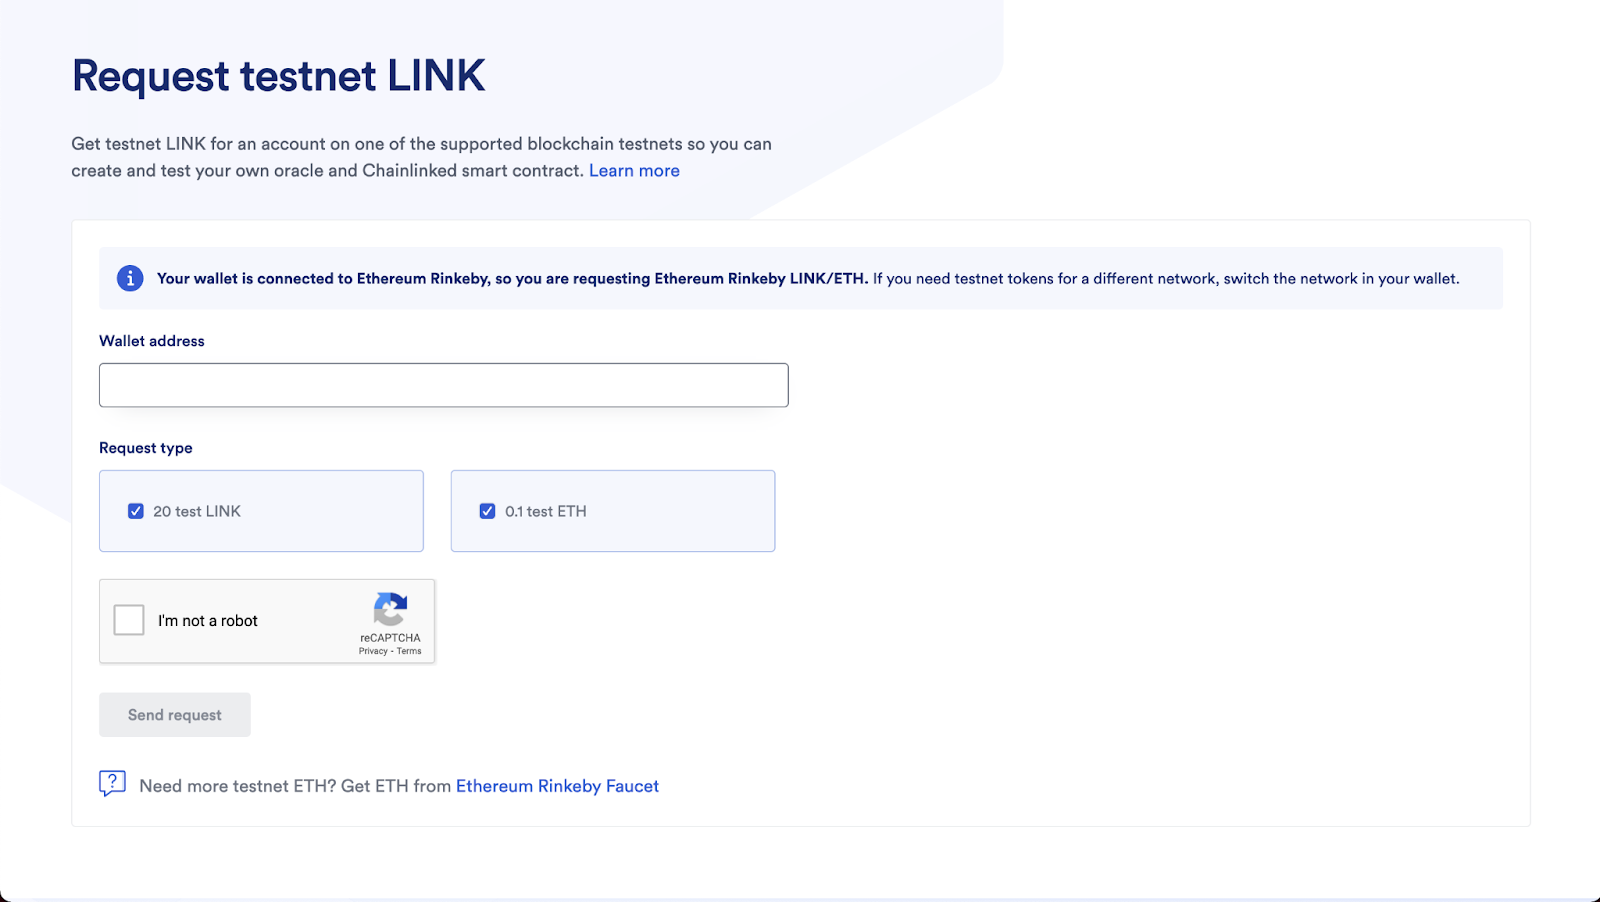
Make sure you have at least 0.1 test ETH in your Metamask account. If you need an additional source to get them to, try the Rinkeby Faucet.
Now let’s get your private key for your newly generated address. First, go into the Account Details section of your Metamask account in the chrome extension. From there, you’ll see an `Export Private Key` button. After entering your password, you’ll see the private key.
Save this in a safe place, or remember how to access it again. It will be necessary to deploy our NFT to the Rinkeby later in this guide.
Setting up Alchemy to push updates to the blockchain
Alchemy is another tool we’ll need. It will help broadcast our contract’s transactions so that miners can pick it up as quickly as possible.
Alchemy is essential for pushing our NFTs and smart contracts into Rinkeby.
First, create an account with Alchemy. As you go through the steps, it’ll ask you for your information. You can skip many of these steps. Alchemy offers a free plan, so make sure you select that. When creating an app, make sure that you choose the Rinkeby Test network in the Network section of the application.
Now you’ll be given access to some variables. The most important ones are your Alchemy API KEY URL under the HTTP column.
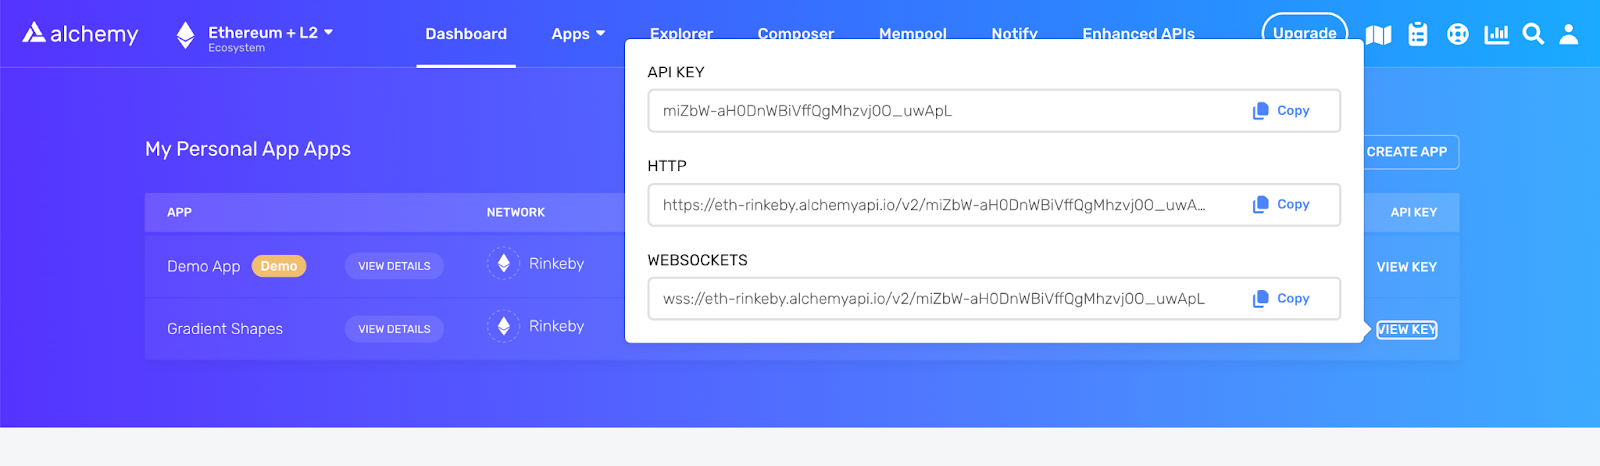
Please keep track of this URL because we’ll be using it very soon in the next section.
Technical Prerequisites
You just created a brand new ETH contract address in your Metamask wallet, got some ETH, got your private key, and set up your Alchemy account.
Now let’s jump right into the technical side of things and create our smart contract for Gradient Shapes.
To continue with this guide, there are some technical prerequisites you must have installed on your machine:
- Node.js >= 16
- NPM >= 8
- Hardhat >= 2.9.7
We’ll build our NFT application using Node.js. Then, we’ll use Solidity to write our actual smart contract. Finally, we’re using a tool called Hardhat that you can install via NPM, which will let us compile Solidity contracts, deploy them, and test them locally.
Hardhat is a JavaScript tool focused on making Ethereum development more accessible.
A Replit container to make things easier for you
If you prefer to develop on your local machine, we’ll explicitly write all the commands.
Throughout this tutorial, the commands we’re using are running on a UNIX machine. So, if you’re using Mac OS or Windows, there might be some additional tools you have to install, or the commands might differ slightly. Specifically, if you have an M1 chip, there are some additional things you’ll have to install.
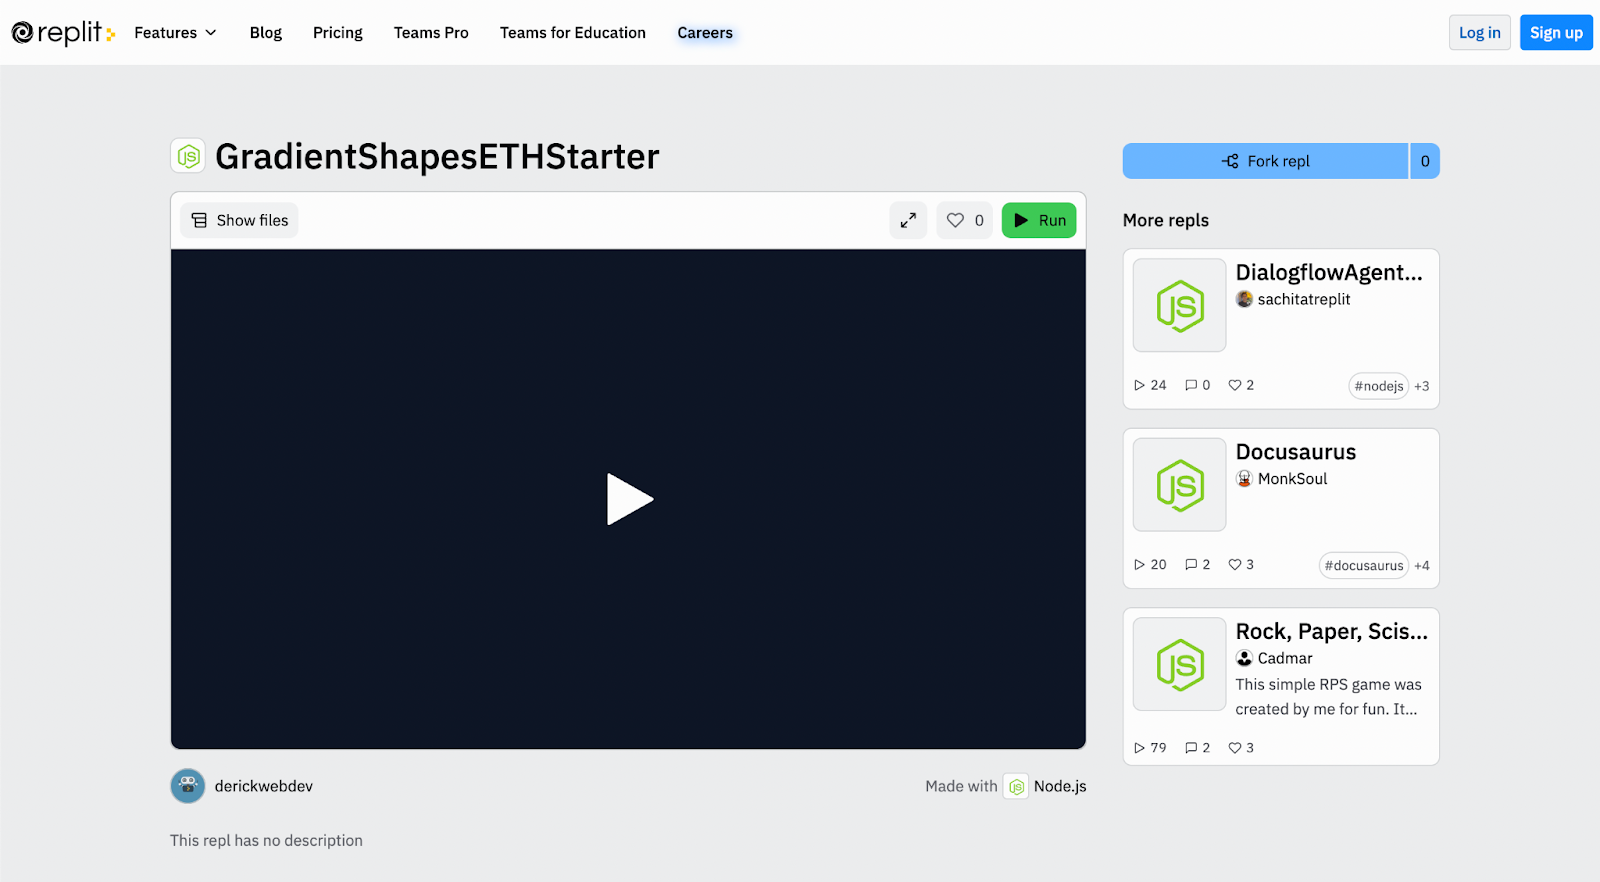
To make things easier for you and ensure all the commands work, we’ve created a Replit container for you. Replit is a browser-based IDE that sets up a full container for you, so you don’t have to worry about setup on your local machine.
The GradientShapesETHStarter Repl will set you up with all the prerequisites to deploy your NFT on Rinkeby.
Visit Repl’s page and click on the Fork Repl button. Next, you’ll have to create your Replit account.
Getting Started With Your NFT Drop
Finally, now that we have all the prerequisites, let’s set up our development environment and start writing code.
If you’re using the Repl environment, all you have to do is fork the project. Then, the dependencies in the `package.json` file will be installed for you automatically.
If you prefer to proceed with local development on your machine, here are some prerequisite commands so we’re all on the same page and have all the same dependencies installed.
mkdir ~/eth-nft-drop-with-crossmint && cd ~/eth-nft-drop-with-crossmint && npm init -y && npm install hardhat @nomiclabs/hardhat-waffle ethereum-waffle chai @nomiclabs/hardhat-ethers ethers @openzeppelin/contracts dotenv @alch/alchemy-web3The above command will create a new directory, initialize NPM, and install all the required dependencies for our NFT drop.
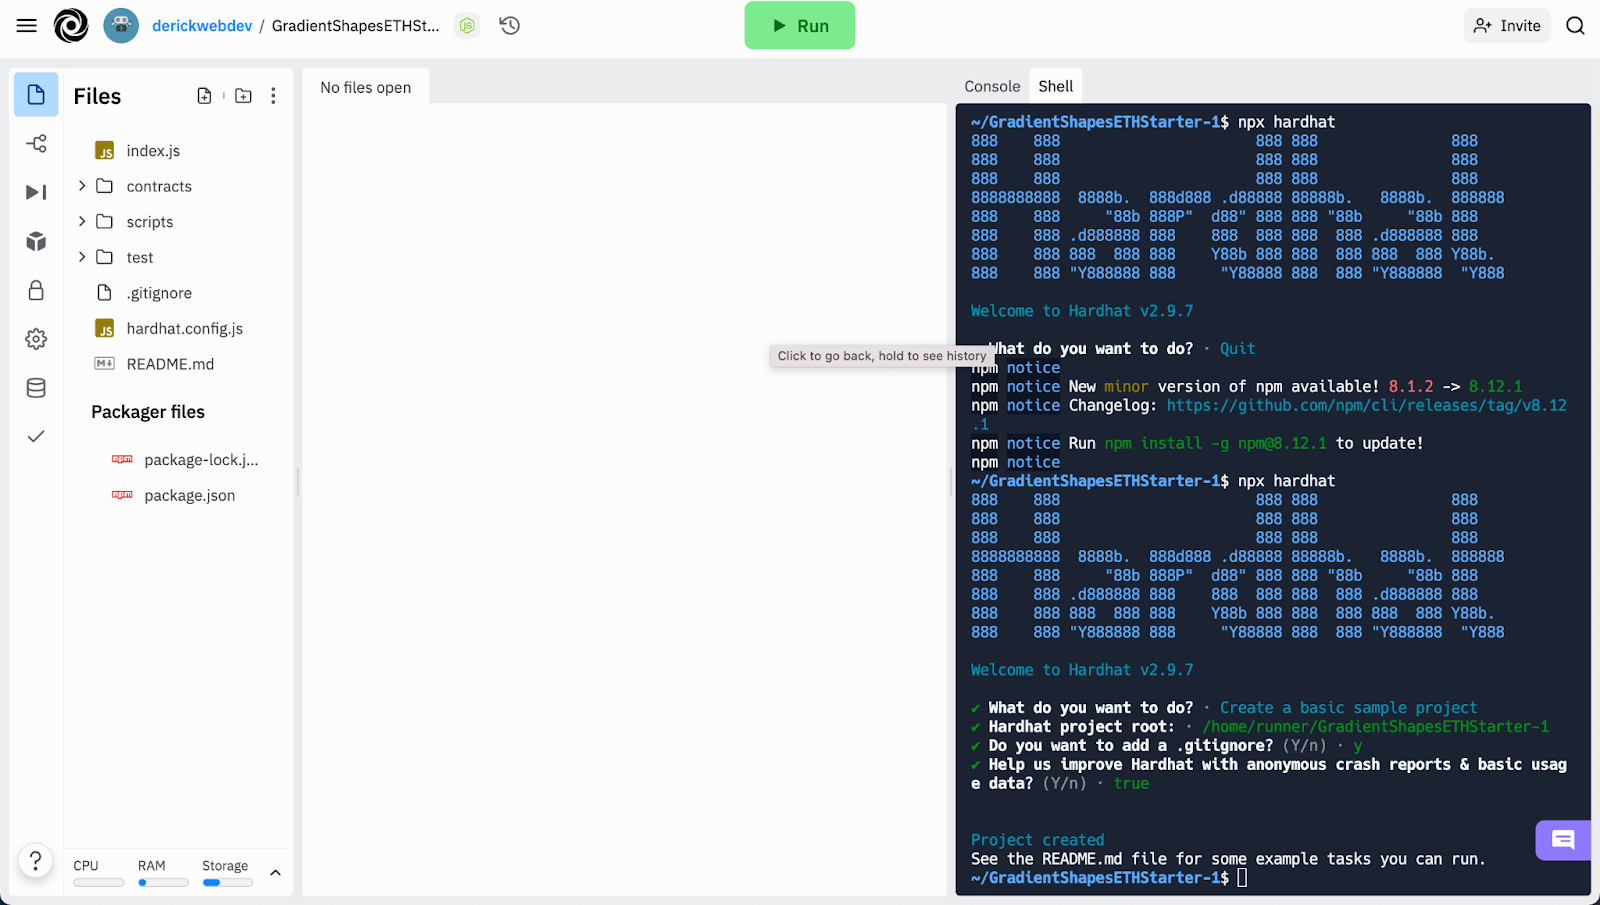
Now running the command below will run the hardhat process and set you up with all the directories you need.
npx hardhatHardhat will provide you with some options to create a new project. First, choose the option to create a basic sample project and then say yes to every other option.
At this point, your directory structure should look something like the following:
Now you can run the following command in your terminal (shell in Replit’s case) to run Hardhat’s sample script.
npx hardhat run scripts/sample-script.jsThat’ll compile the sample Solidity smart contract Hardhat generated for us when you initially created your project. If you set up everything correctly, then you will see the following message:
Compiled 1 Solidity file successfully
Deploying a Greeter with greeting: Hello, Hardhat!
Greeter deployed to: 0x5FbDB2315678afecb367f032d93F642f64180aa3
The next step is to make sure your Hardhat configuration, hardhat.config.js, looks like the code snippet below:
require('@nomiclabs/hardhat-waffle');
require('dotenv').config({ path: '../.env' });
const { API_URL, PRIVATE_KEY } = process.env;
module.exports = {
solidity: {
  version: "0.8.1"
},
networks: {
  rinkeby: {
    url: API_URL,
    accounts: [`0x${PRIVATE_KEY}`],
  },
},
};
If you’re using the Replit, make sure you remove the require('dotenv').config({path: '../.env'}) line from the hardhat.config.js file. The way that Replit handles environment variables is different from a local environment.
Setting your environment variables
We just gathered a lot of data that we’ll need for our drop while signing up for various services. The next step is to make sure our environment variables are in place. We’ll use these to deploy our smart contract and mint our NFT later in the guide.
If you’re developing locally, go ahead and create a .env file in the root of your NFT with the following command:
cd ~/eth-nft-drop-with-crossmint && touch .envMake sure that your .env file looks like the following:
API_URL=
PRIVATE_KEY=
PUBLIC_KEY=
CONTRACT_ADDRESS=
Please fill out each of those variables with all the information we obtained in the previous step. The API_URL variable should be your Alchemy API KEY URL. PRIVATE_KEY is your private MetaMask wallet key, and PUBLIC_KEY is your wallet’s public address.
For CONTRACT_ADDRESS, leave that one blank for now. We’ll fill in a bit later after deploying to Rinkeby, so let’s keep that one blank.
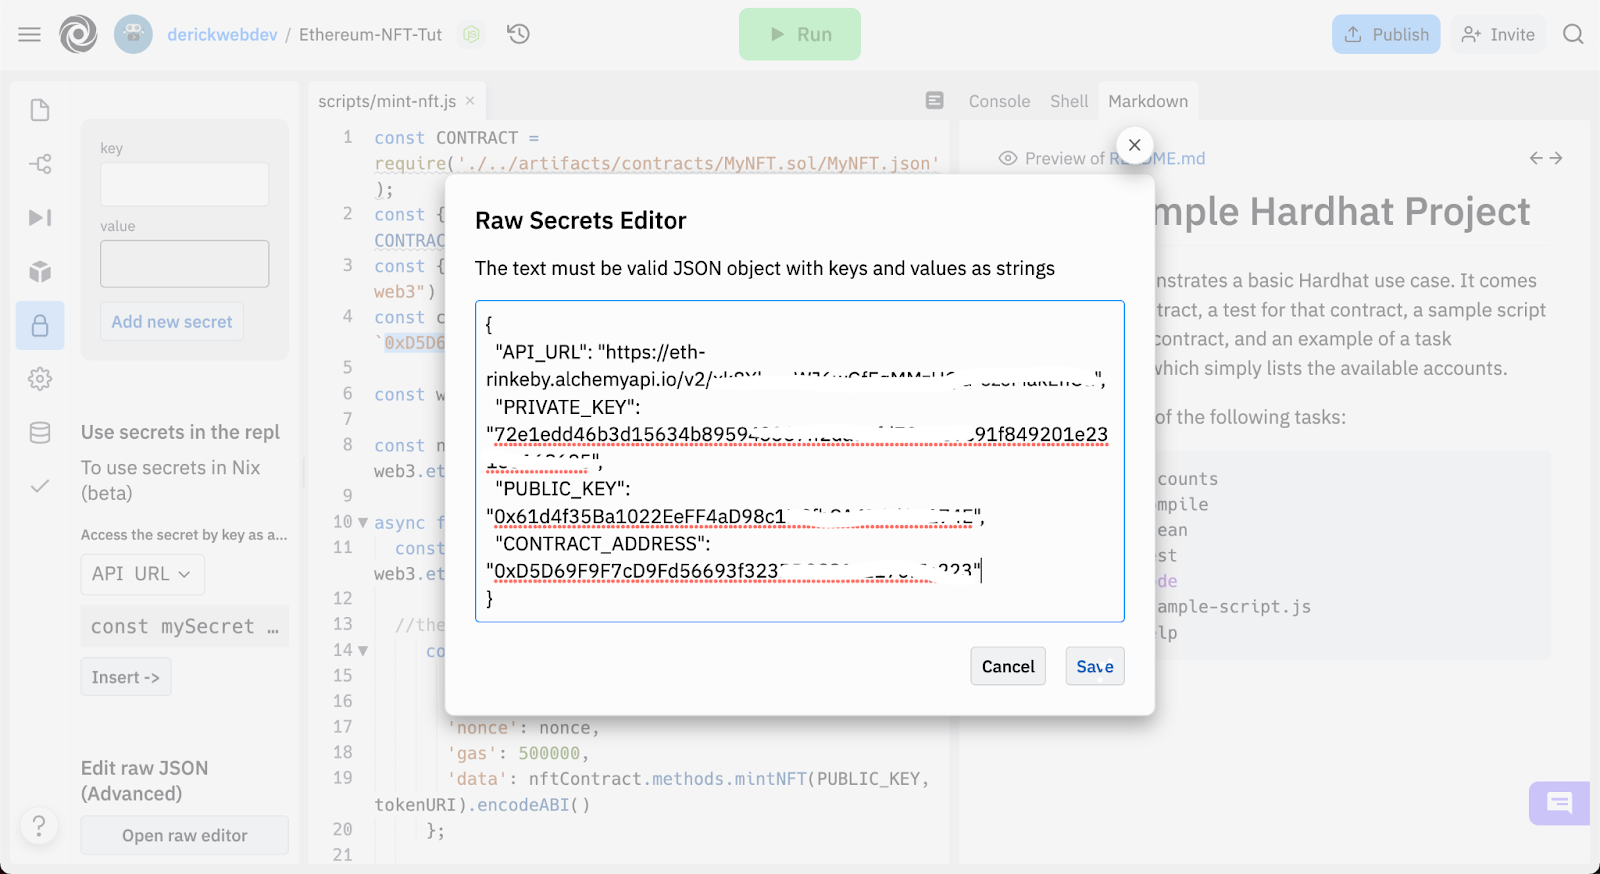
If you’re using the Replit, things will be slightly different. Go into the left-hand sidebar, click on the lock icon, and see it’s the secrets area. Scroll to the bottom and click on the Open Raw Editor button.
Enter all the information you would have entered into that .env file here as a JSON object.
Writing Your First Smart Contract
Great, we set up our Hardhat project, compiled a sample contract, and got our configuration and environment variables in place.
Now let’s write our custom NFT contract for Gradient Shapes using Solidity.
If you’re already familiar with JavaScript, Solidity will feel very familiar. This language takes inspiration from curly brace languages like C++ and JavaScript.
If you’re doing local development, copy and paste this into a new file in the contracts folder called GradientShapes.sol. You can create that file with the following command:
touch ./contracts/GradientShapes.solEven better, write the file out line by line to understand what’s going on!
Here’s the code for the smart contract:
//SPDX-License-Identifier: Unlicense
pragma solidity ^0.8.1;
import "@openzeppelin/contracts/token/ERC721/ERC721.sol";
import "@openzeppelin/contracts/utils/Counters.sol";
import "@openzeppelin/contracts/token/ERC721/extensions/ERC721URIStorage.sol";
contract GradientShapesNFT is ERC721URIStorage {
using Counters for Counters.Counter;
Counters.Counter private _tokenIds;

constructor() ERC721("GradientShapes", "GS") {}

function mintNFT(address recipient, string memory tokenURI) external payable returns (uint256) {
_tokenIds.increment();

uint256 newItemId = _tokenIds.current();
_mint(recipient, newItemId);
_setTokenURI(newItemId, tokenURI);

return newItemId;
}
}
That’s right, short and sweet with all the bare necessities we need to launch our NFT. So let’s go through it line by line.
// SPDX-License-Identifier: UNLICENSEDTrust in smart contracts can be better established if their source code is available. Therefore, Ethereum makes the source code available for smart contracts by default. In addition, making the source code available has the potential to touch on legal issues related to copyright.
That’s why the Solidity compiler encourages the use of machine-readable SPDX license identifiers.
Every source file should start with a comment indicating its license. For example: //SPDC-License-Identifer: MIT to indicate an MIT license.
We don’t want to specify a license, so we use the UNLICENSED special value.
pragma solidity ^0.8.1;The pragma keyword enables certain compiler features or checks. In this case, we want to make sure that we’re using at least version 0.8.1 of the Solidity compiler for this file.
import “@openzeppelin/contracts/token/ERC721/ERC721.sol”;
import “@openzeppelin/contracts/utils/Counters.sol”;
import “@openzeppelin/contracts/token/ERC721/extensions/ERC721URIStorage.sol”;
At the beginning of this tutorial, you installed a package via npm called @openzeppelin/contracts. OpenZeppelin provides many useful libraries for developing smart contracts like the ones we imported above.
The ERC721.sol and ERC721URIStorage.sol libraries implement ERC721, the NFT standard on Ethereum, and many useful methods for us.
Next, we included the Counters.sol file. Each NFT that gets minted must contain a unique identifier. In this case, we’re keeping it simple and using Counters.sol which allows us to increase or decrease counters by 1. In a real case scenario, we’d generate these IDs by a different method.
This library implements standards like ERC721, which is the NFT standard. The NFT standard is called ERC721, which you can read a bit about here.
contract GradientShapesNFT is ERC721URIStorage {}In Solidity, the is keyword is used for inheritance, and we’re inheriting from the ERC721 NFT standard that OpenZeppelin created.
We’ll be able to use methods like _mint, _setTokenURI, and others to mint our NFT in the smart contract, which we’ll see later.
using Counters for Counters.Counter;
Counters.Counter private _tokenIds;
Right after declaring your contract is the area where Solidity allows you to define your variables. In this case, because we only ever need one _tokenIds for the entirety of the contract, we can define it here.
constructor() ERC721 (“GradientShapes”, “GS”) {}A constructor in Solidity is a unique function that only runs once in the entire lifetime of the contract you deploy. The first parameter is the name of the contract. The second parameter is the symbol for your contract.
function mintNFT(address recipient, string memory tokenURI) public returns (uint256) {This is our actual minting function. It will take care of getting our NFT onto the Ethereum blockchain.
We will keep this contract as simple as possible because it’s our first NFT. You’ll notice we’re calling a lot of methods here. ERC721URIStorage provides these methods for us, taking care of a lot of the underlying NFT infrastructure.
I wanted to keep this first contract as simple as possible, so you understand the core fundamental concepts. So let’s break down each thing individually.
_tokenIds.increment();
uint256 newItemId = _tokenIds.current();
_mint(recipient, newItemId);
_setTokenURI(newItemId, tokenURI);

return newItemId;
This code provides us with a new tokenId, and then we mint a new one to a specific recipient. Then, finally, we pass in the data that this NFT will require using the tokenURI variable.
In the next section, we’ll explain more about these variables and how we’ll pass them in.
Creating the metadata for our individual NFTs

At the core of an NFT is metadata. This metadata takes the form of a JSON object that often contains at least the following items:
- NFT’s name
- Description of the NFT
- The image
To let a user mint an NFT, we will create custom JSON metadata, and then that’s what we’ll upload to the blockchain.
The tokenURI parameter should resolve to a JSON document describing the NFT’s metadata.
If you’re using the Replit you will see a folder called metadata that already has ellipse.json and metadata for a few other shapes in JSON format.
If you’re developing locally, here’s a command where you can get these files onto your machine. They’re essential because they contain IPFS links to the gradient shape images.
Make sure you’re in the root of your directory, and then run the following command:
cd ~/eth-nft-drop-with-crossmint/ && wget -c https://cdn.glitch.global/11018198-9a51-415b-b47f-ee1e25523b2b/metadata.zip?v=1654510270699 -O metadata.zip && unzip metadata.zipThat command will download a ZIP file that contains the metadata JSON files and then unzip it into the root directory. If you run into issues with some of the commands, mainly the unzip command, ensure that you have it installed on your UNIX machine.
If you’re not able to unzip through the terminal, put the above URL directly into your browser and download the ZIP file directly. Make sure you place the unzipped metadata folder into the root directory of your NFT drop.
How do you store files on a decentralized blockchain? Usually, in a web2 world, you’d upload it to Imgur or some other image host. But that’s centrally controlled. So if you genuinely want to own your NFT, you want to store it so no one can change it or make it disappear.
In a web2 world, the person who originally uploaded the images can remove them or change them into something else, but in a web3 world, we need a distributed way to upload data to the cloud.
This is where IPFS comes in. IPFS is a distributed system for storing and accessing files, websites, applications, and data.
We’re going to utilize a service called Pinata that makes it easy to upload files and get them on IPFS so that our NFTs are truly decentralized.
Go in and create your account on Pinata, and then afterwards, you’ll be presented with a way to upload files. Make sure you select `File` and then upload `Ellipse.json` into here.
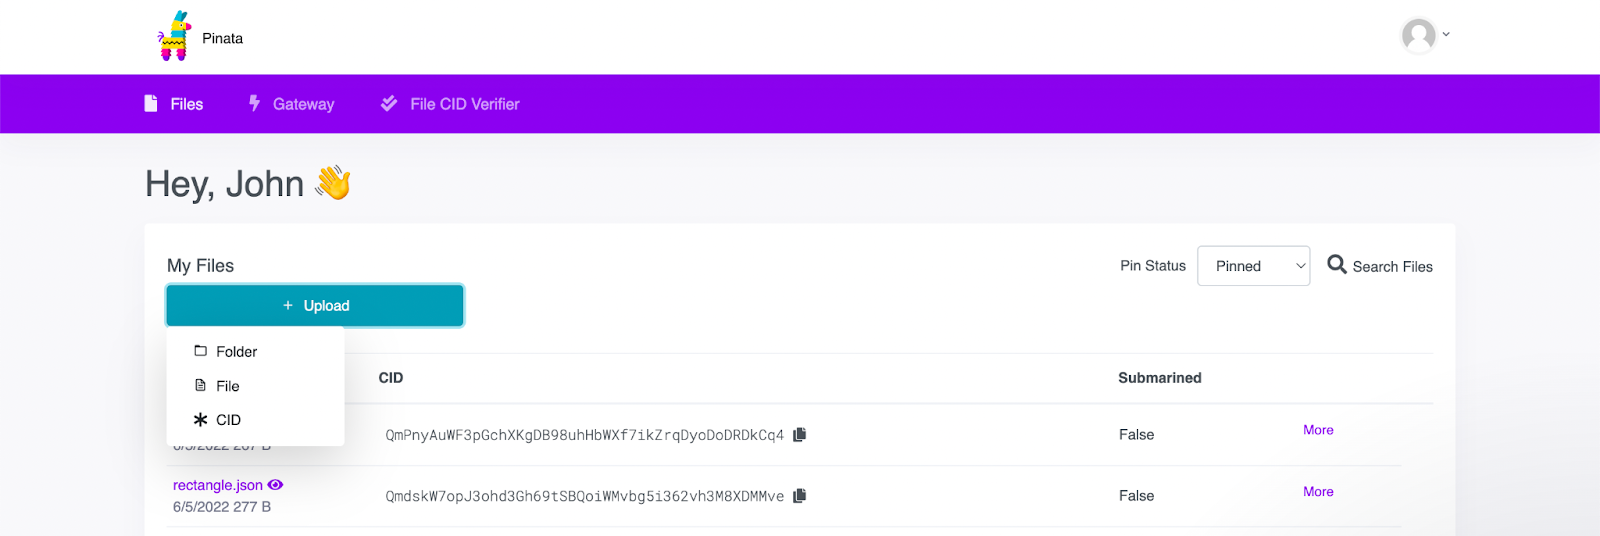
After you upload, you’ll see it appear in the list under the CID column. Click on the copy icon to copy your CID, and we’ll be using this later to reference our NFT.
Go ahead and upload all the JSON files into this interface. You might have to select them individually. At the end you should have a few CIDs available.
Keep this tab open. We’ll be needing these CIDs very soon.
Deploying your smart contract to Rinkeby
Our assets are uploaded, our smart contract is ready to go, and now the next step is compiling it and then uploading it to the Rinkeby test network.
Before you ran npx hardhat run scripts/sample-script.js. We’ll create a new run script using JavaScript to compile our code and get it uploaded to Rinkeby.
Run the following command to create the file in the scripts folder.
touch ./scripts/run.jsLet’s do what we did before. First, copy the following code and paste it into the run.js file.
async function main() {
const MyNFT = await ethers.getContractFactory("GradientShapesNFT");
// Start deployment, returning a promise that resolves to a contract object
const myNFT = await MyNFT.deploy()
await myNFT.deployed()
console.log("Contract deployed to address:", myNFT.address)
}
main()
.then(() => process.exit(0))
.catch((error) => {
console.error(error)
process.exit(1)
});
If you’re familiar with JavaScript, you’ll notice that you have access to an ethers object without actually importing it into the script. This object gets injected into the file when you run the file using the following command:
cd ~/eth-nft-drop-with-crossmint/scripts && npx hardhat run run.js — network rinkebyThe purpose of this file is purely to deploy our contract to the Rinkeby test network.
If successfully deployed, you should see the new contract address displayed in the terminal. Make sure you copy this value and add it into the CONTRACT_ADDRESS variable in your .env file.
Minting our first NFT through the console
You successfully deployed your contract to Rinkeby. You also uploaded all the assets into the IPFS via Pinata. So, finally, we have everything we need to mint our first NFT.
We’ll do this in three ways in this guide: through a node script, through a website, and finally with credit card integration.
Let’s get started with the script first.
First, go into the scripts folder and create a mint-nft.js file. You can do that with the following command from the root of your NFT folder:
touch ./scripts/mint-nft.jsCopy and paste the following code into that file, and we’ll explain the most critical parts line by line.
const { createAlchemyWeb3 } = require("@alch/alchemy-web3")
const CONTRACT = require('./../artifacts/contracts/GradientShapes.sol/GradientShapesNFT.json');
require('dotenv').config({ path: './../.env' });
const { API_URL, PUBLIC_KEY, PRIVATE_KEY, CONTRACT_ADDRESS } = process.env;
const CID = `CID_GOES_HERE`;
const web3 = createAlchemyWeb3(`${API_URL}`);
const nftContract = new web3.eth.Contract(CONTRACT.abi, CONTRACT_ADDRESS);
async function mintNFT(tokenURI) {
const nonce = await web3.eth.getTransactionCount(PUBLIC_KEY, 'latest');

//the transaction
const tx = {
'from': PUBLIC_KEY,
'to': CONTRACT_ADDRESS,
'nonce': nonce,
'gas': 500000,
'data': nftContract.methods.mintNFT(PUBLIC_KEY, tokenURI).encodeABI()
};

const signPromise = web3.eth.accounts.signTransaction(tx, `0x${PRIVATE_KEY}`);

signPromise
.then((signedTx) => {
  web3.eth.sendSignedTransaction(
    signedTx.rawTransaction,
    function(err, hash) {
      if (!err) {
        console.log(
          "The hash of your transaction is: ",hash,
           "\nCheck Alchemy's Mempool to view the status of your transaction!"
        )
       } else {
         console.log(
           "Something went wrong when submitting your transaction:", err)
       }
     }
   )
})
.catch((err) => {
  console.log(" Promise failed:", err)
});

}
mintNFT(`ipfs://${CID}`);
If you’re using Replit, remove the require('dotenv').config({ path: './../.env' }); because Replit handles environment variables differently and this library isn’t required.
The last thing to do is to replace the value for the variable CID with one of the CID of the JSON files you uploaded. This CID contains the NFT we’ll mint.
Now go back to the terminal and type in node ./scripts/mint-nft.js and if there are no errors, you should see the following in your terminal:
The hash of your transaction is: 0x1f6fcd50e2db5135d3db75b2517657a4d2da4f5c3ec7f913a465dc51de1399d7
Check Alchemy's Mempool to view the status of your transaction!
Go back into your Alchemy dashboard and access the Mempool section. Search for the transaction’s hash that you just produced in the terminal.
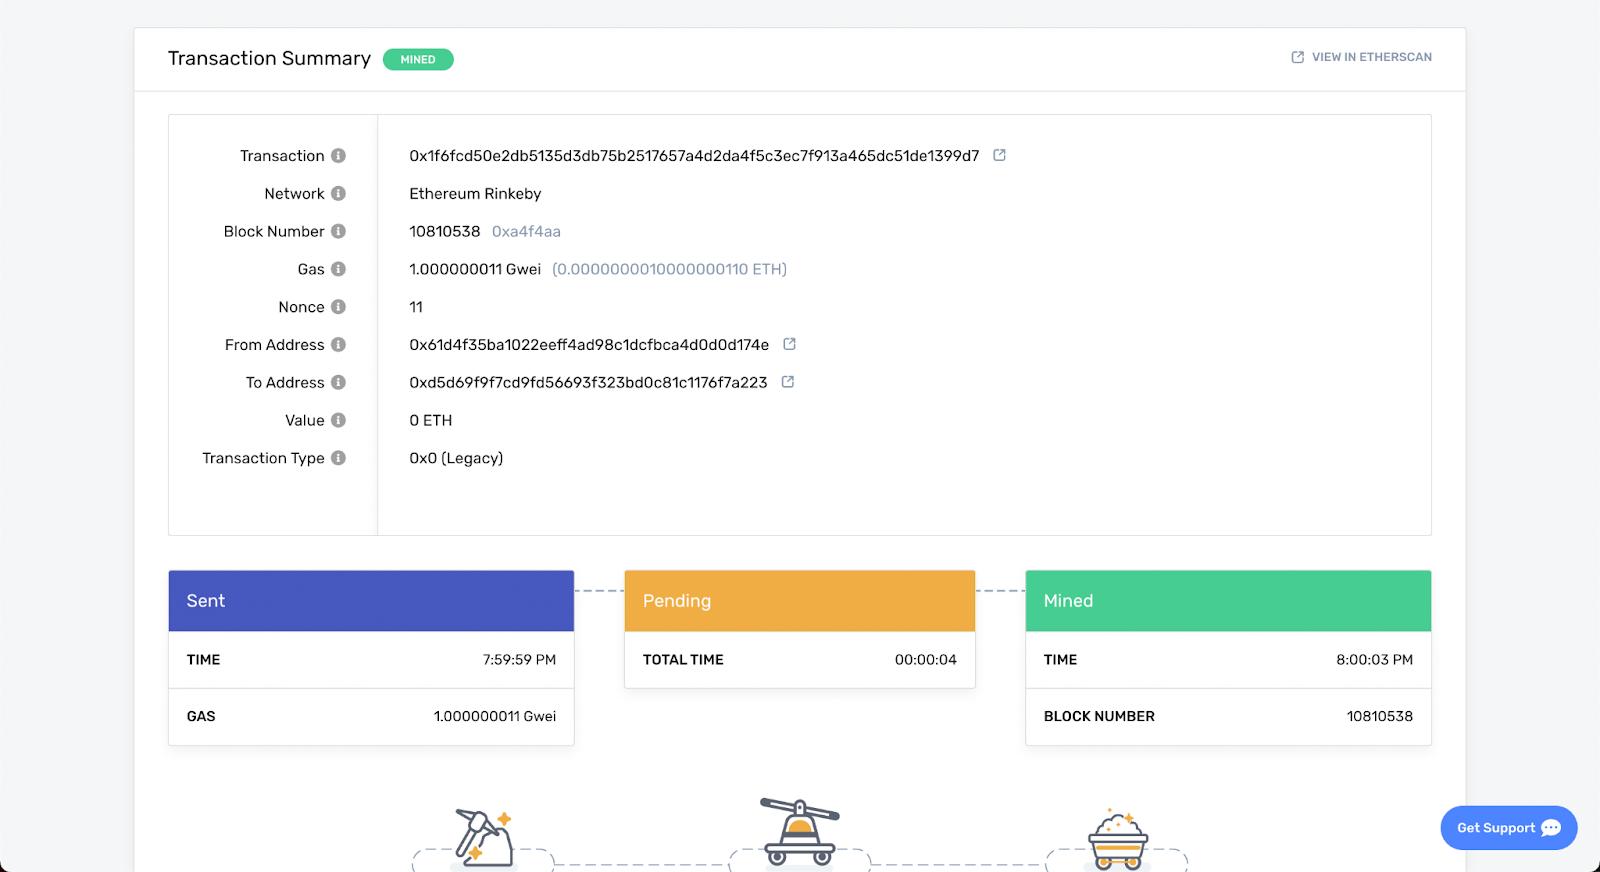
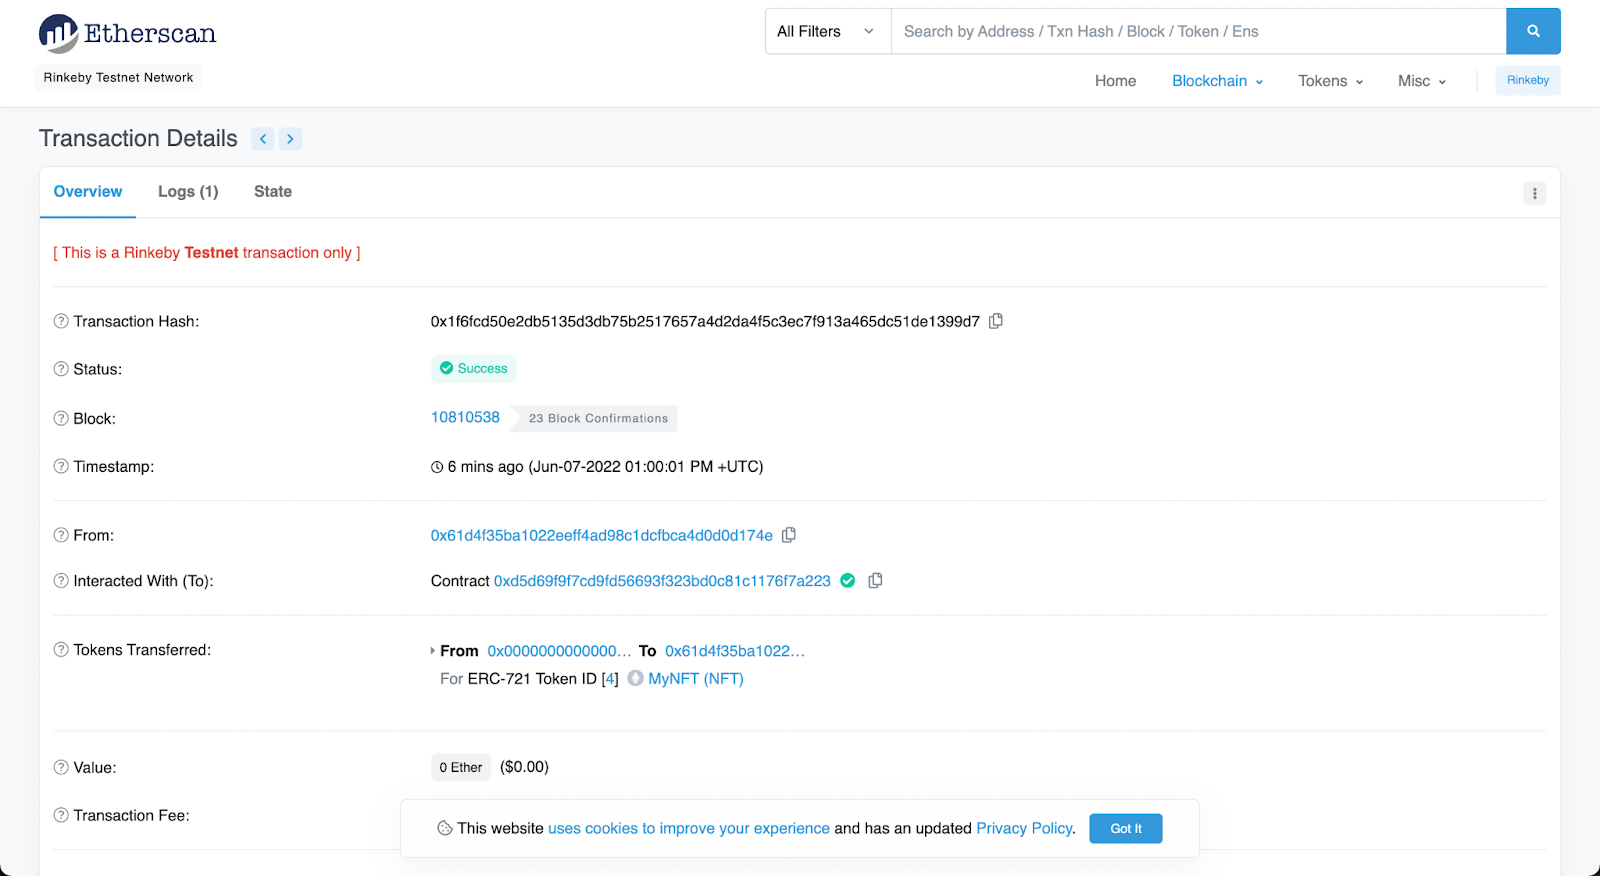
If you click on the icon beside the transaction ID, the first one in the transaction summary, it will lead you to Etherscan, and from there you can see many more important details.
Seeing your first NFT on OpenSea
To see your newly minted NFT up on Opensea, first visit testnets.opensea.io, where Opensea puts NFTs minted on the various devnets and testnets.
On the above Etherscan page, you’ll see the contract address in the Interact With (to) section. Copy that one and then paste it into Opensea. Don’t press enter yet, and after a few milliseconds, your collection will show up, and then you can click it.
If everything went through successfully, you should see one of your recently minted shapes right there on the page.
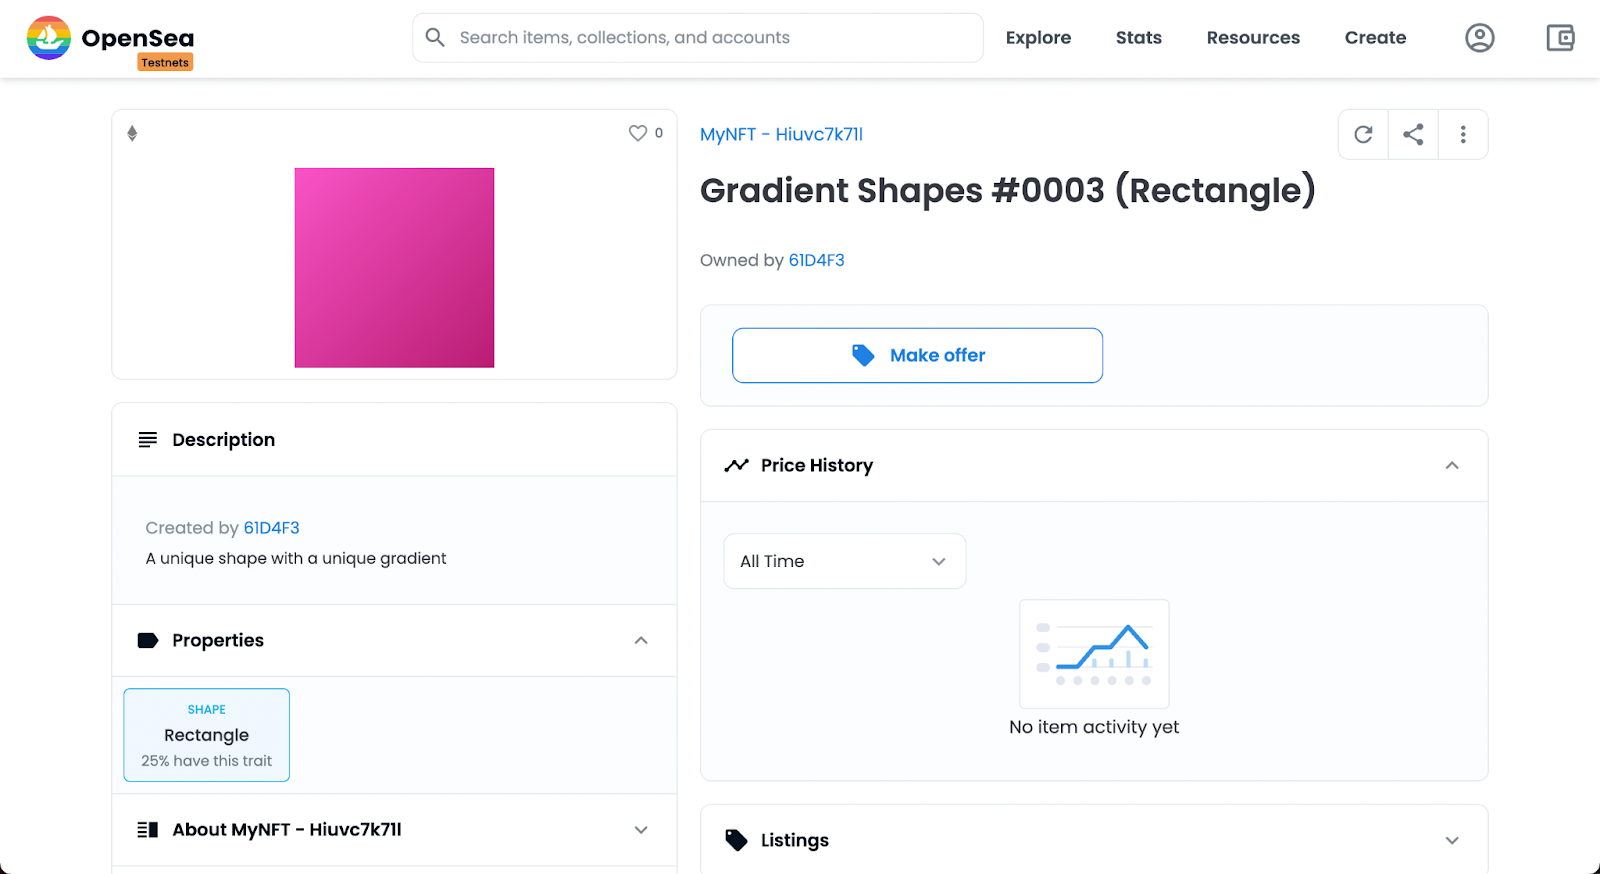
You successfully minted your NFT and now it’s available for you to see on OpenSea.
Allowing your to mint with a website
Let’s take this to the next level and automate it further by allowing minting with a website.
We’ve set up a React.js starter for you on Replit to make this seamless and easy for you. It’s a separate project from the one at the beginning of this guide.
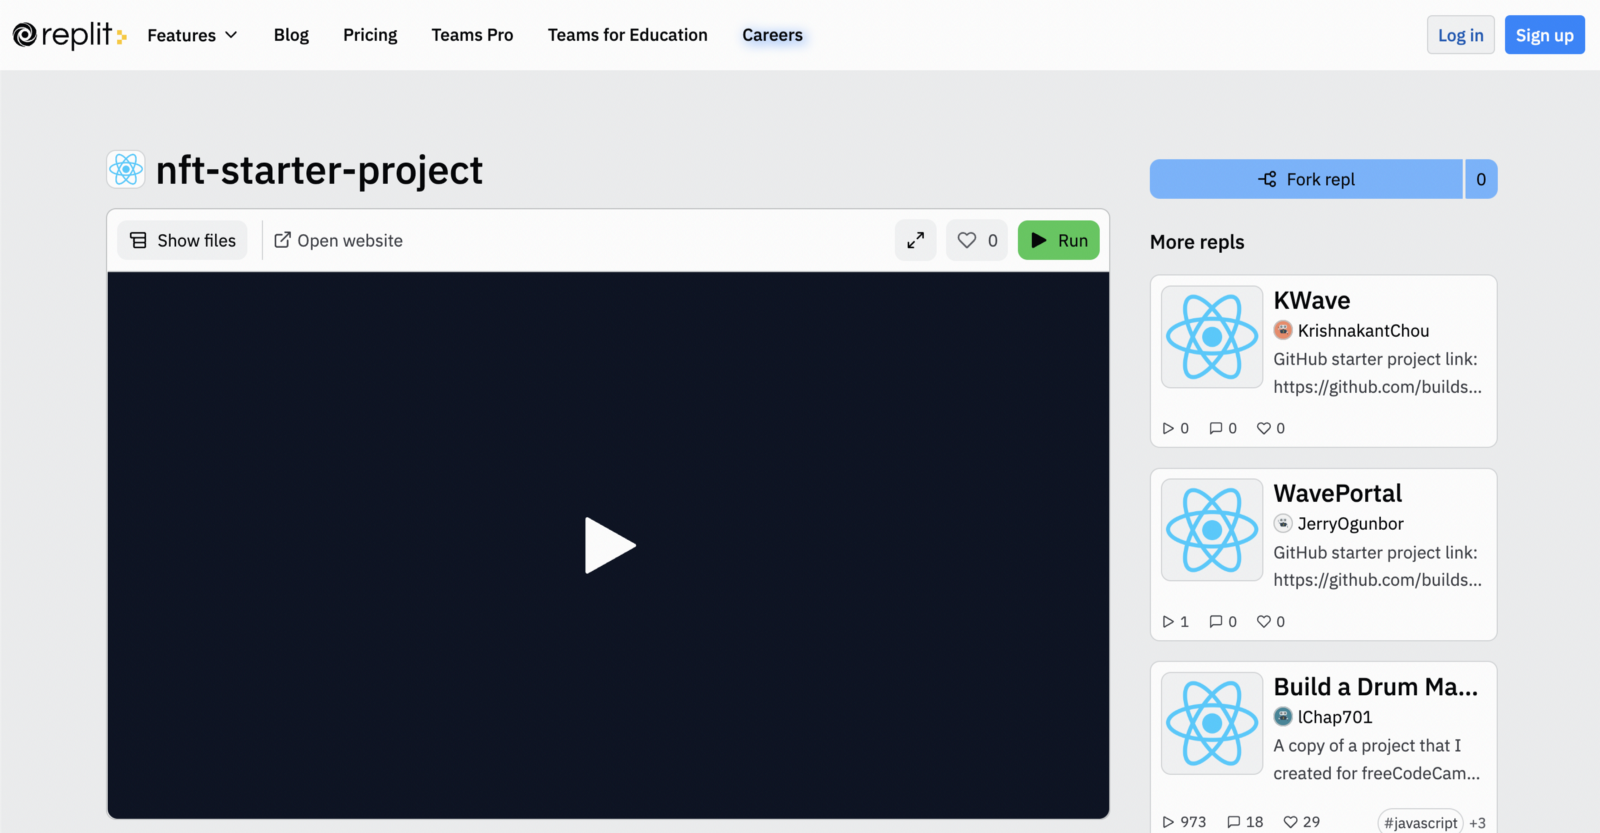
Make sure you fork the Replit and create your project from this one. If you’d instead run the project locally, download the project files here, and then run npm install so we’re all on the same page.
Afterward, and you hit the Run button on Repl, or npm run dev in the terminal, you should see the following screen at localhost:3000 or the URL provided to you by Replit.
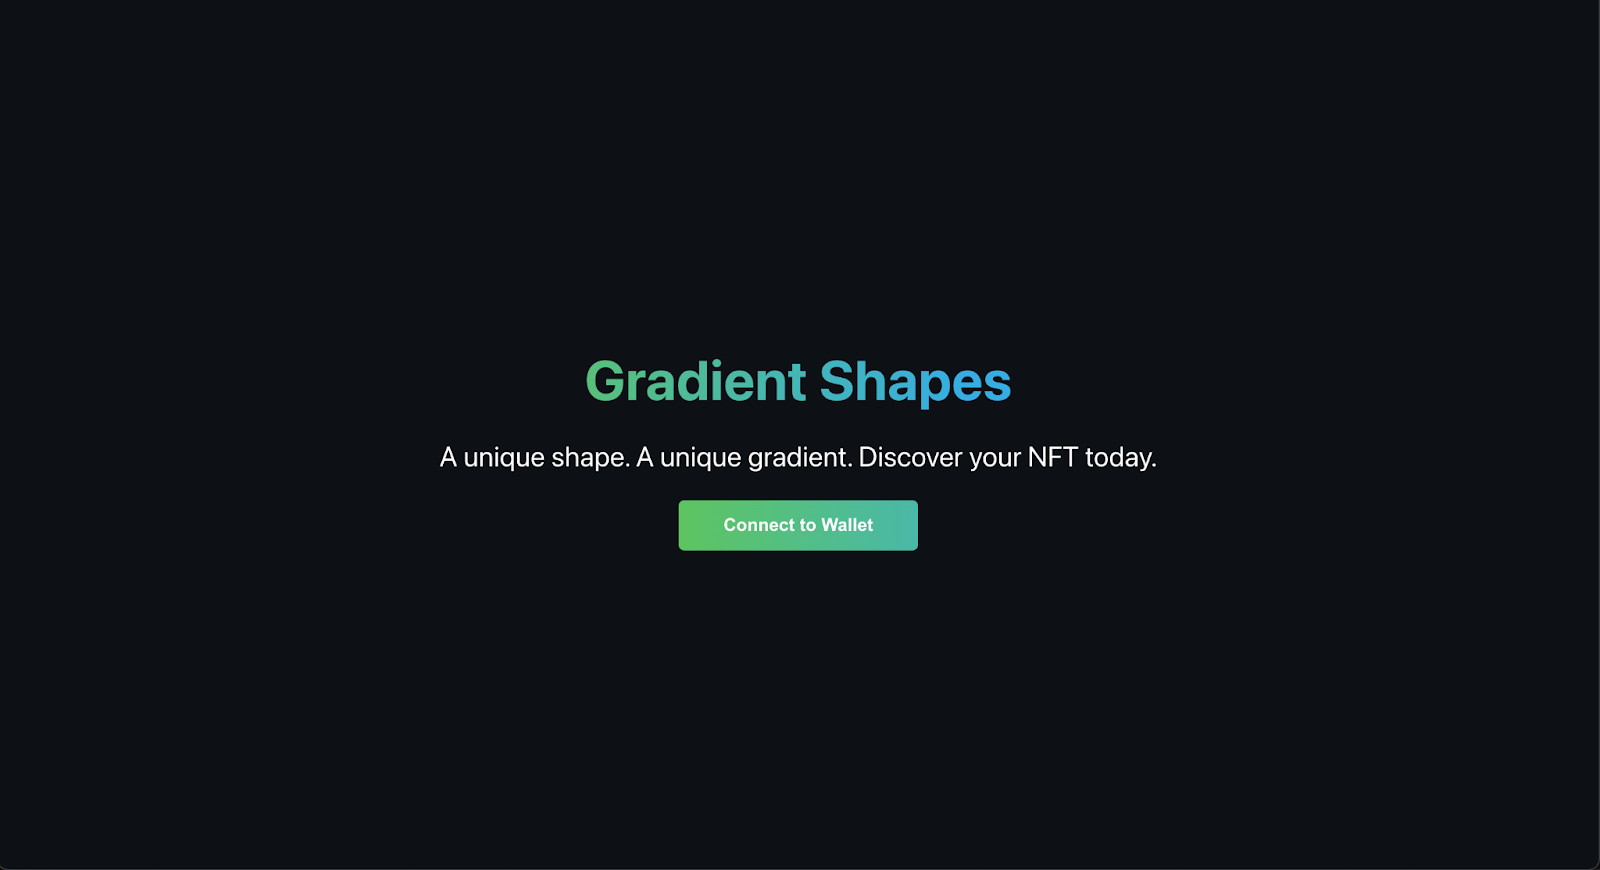
Nice, the website is running but there’s still some information to get in here before it works and we can mint the next NFT.
Getting your contract address and your abi section to start minting
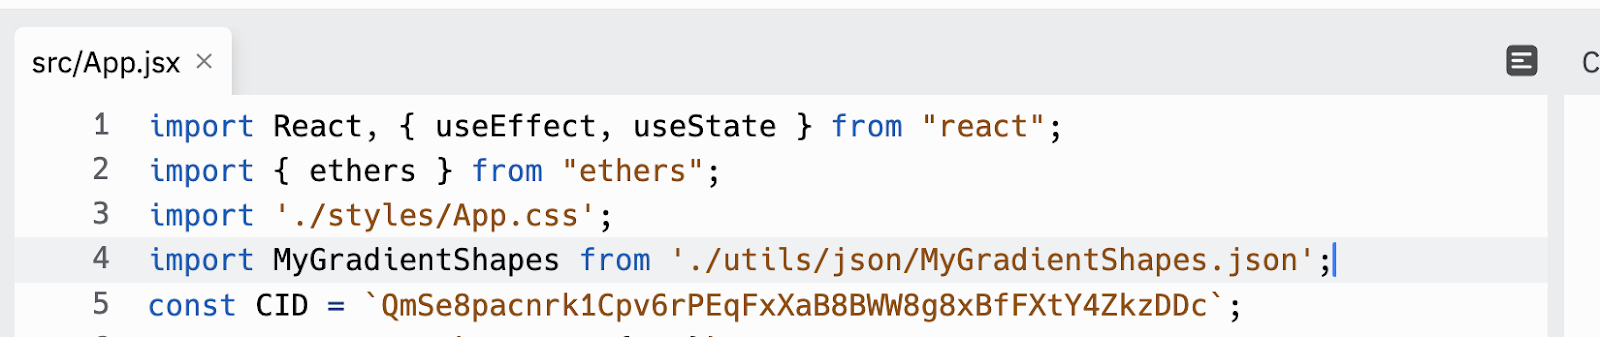
Awesome, you got your website up and going. Go into the App.tsx file and input your contract address into the CONTRACT_ADDRESS variable.
The next step is getting our compiled contract’s ABI JSON and ensuring the website has access to it.
Let’s create a JSON file for that purpose with the following command:
mkdir utils && cd utils && mkdir json && cd json && touch MyGradientShapes.json
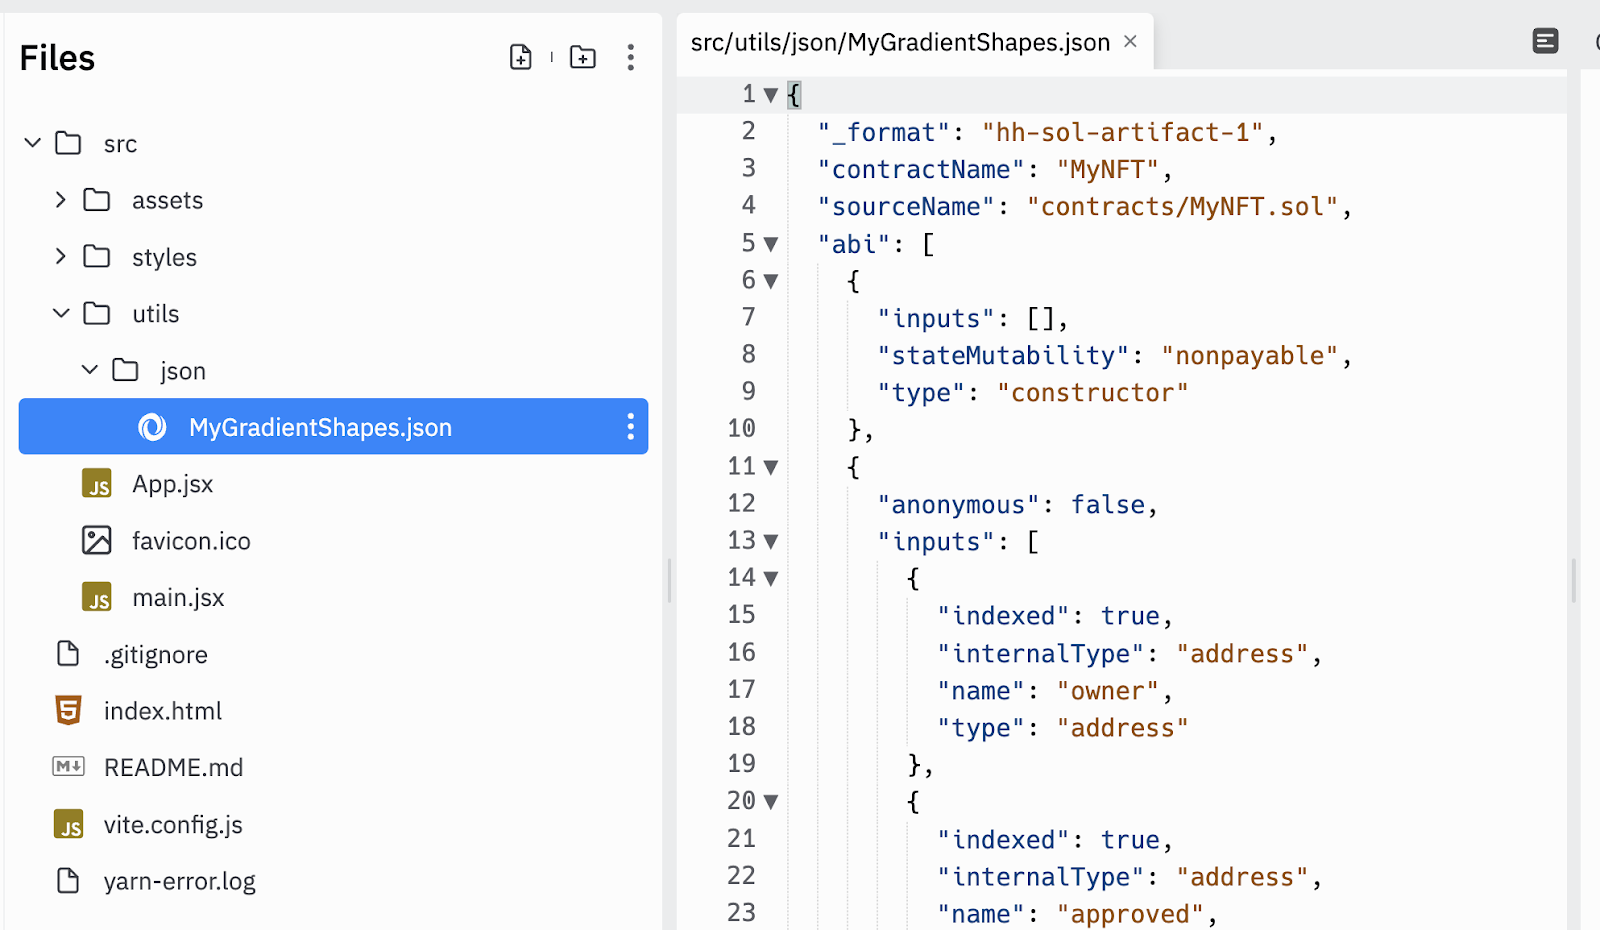
This command will create a new folder called utils, and inside of there, create a jsonfolder and create an empty GradientShapes.json. You’ll put your ABI inside of this GradientShapes.json file.
You can find the ABI file in the following location: ./artifacts/contracts/GradientShapes.sol/GradientShapes.json. Make sure you get the one named .json and not .dbg.json. Then, copy that whole JSON file and paste it back into the file on your website.
It should look something like the following:
Nice, the website is running but there’s still some information to get in here before it works and we can mint the next NFT.
Getting your contract address and your abi section to start minting
Awesome, you got your website up and going. Go into the App.tsx file and input your contract address into the CONTRACT_ADDRESS variable.
The next step is getting our compiled contract’s ABI JSON and ensuring the website has access to it.
Let’s create a JSON file for that purpose with the following command:
mkdir utils && cd utils && mkdir json && cd json && touch MyGradientShapes.jsonThis command will create a new folder called utils, and inside of there, create a jsonfolder and create an empty GradientShapes.json. You’ll put your ABI inside of this GradientShapes.json file.
You can find the ABI file in the following location: ./artifacts/contracts/GradientShapes.sol/GradientShapes.json. Make sure you get the one named .json and not .dbg.json. Then, copy that whole JSON file and paste it back into the file on your website.
It should look something like the following:
Go back into your Pinata dashboard, get another one of your IPFS CID ids of one of the JSON files that you uploaded and paste it into the CID variable in the App.tsx file. Choose anyone you like, perhaps Rectangle or Polygon?
It’s looking very similar to what we did with the mint-nft.js file in the previous section, but in this case we’re setting the recipient address of the NFT to the connected Metamask wallet.
Run the app with npm run dev or click the Run button if you’re using the Replit.
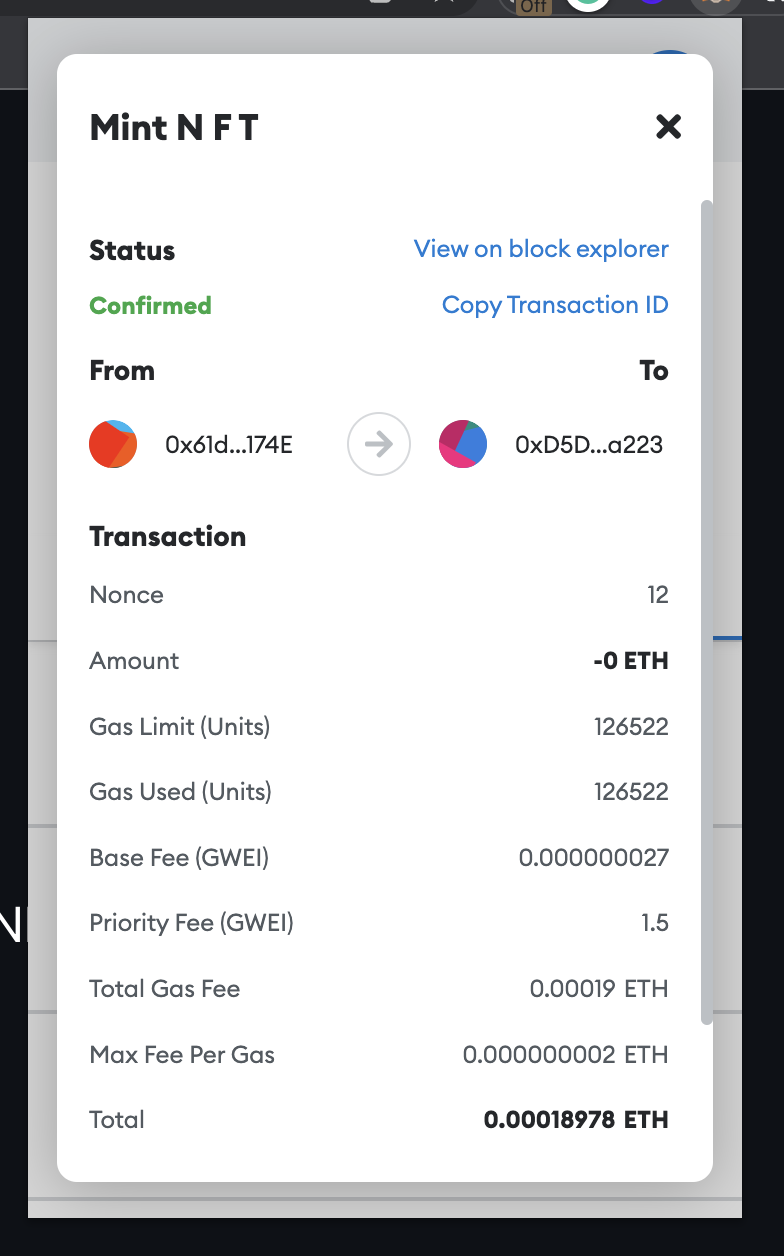
After clicking on the Mint NFT button on the website and you check your Metamask chrome extension you’ll see the following screen after the transaction completes.
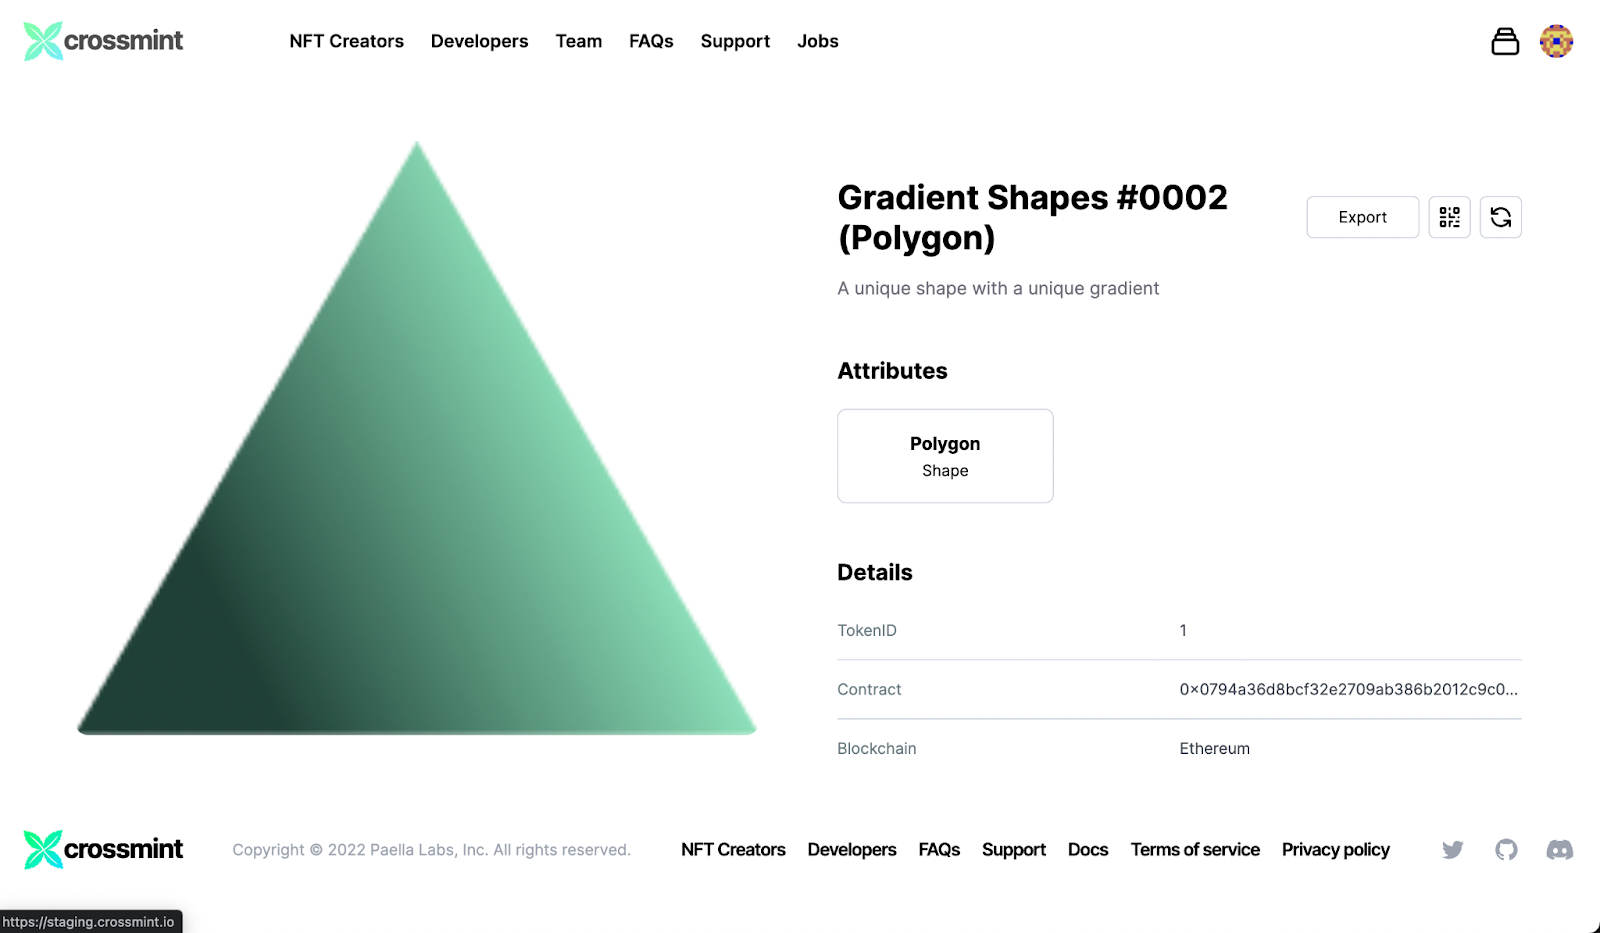
Now if you go back into OpenSea in the primary page for your collection’s contract address, then you should see the NFT that you choose to enter into the CID variable. Congratulations on minting your second NFT, and this time with a button!
Simplifying the process with Crossmint
Now let’s mint our NFT in the easiest way possible, using Crossmint. Integrating Crosmint into your mint website and letting your users get an NFT with a credit card in less than 5 minutes (check all features from our NFT checkout).
Creating your Crossmint developer account
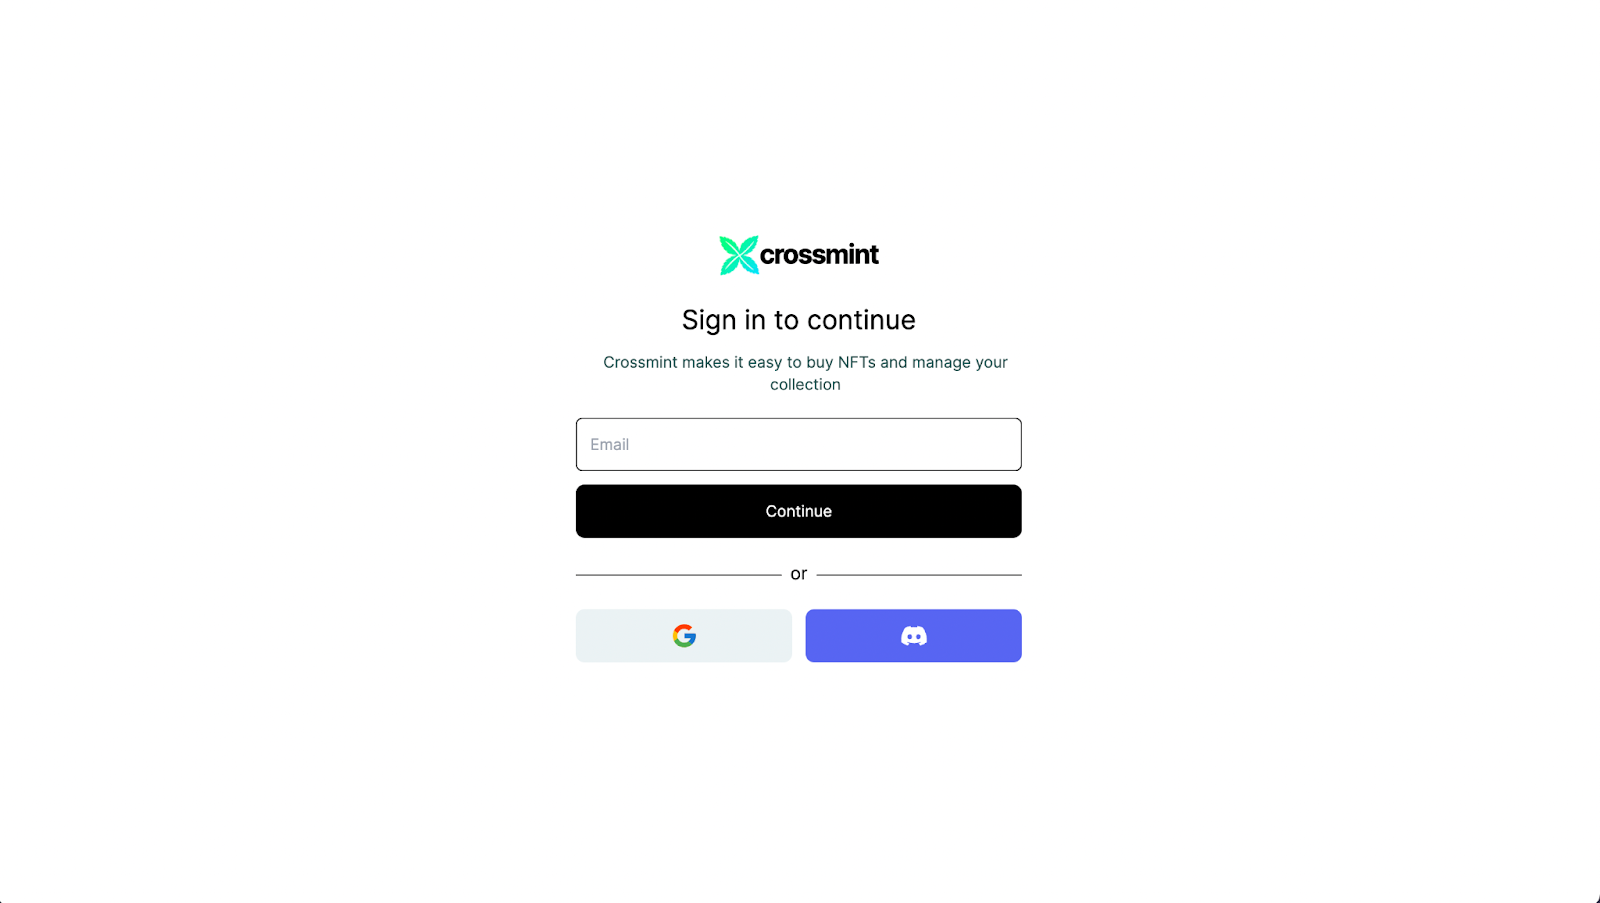
First, visit the Crossmint Staging Developer console and create a new account.
When you’re creating a new collection, make sure that you select Ethereum, and then click ERC721 because that’s what we built our NFT smart contract with.
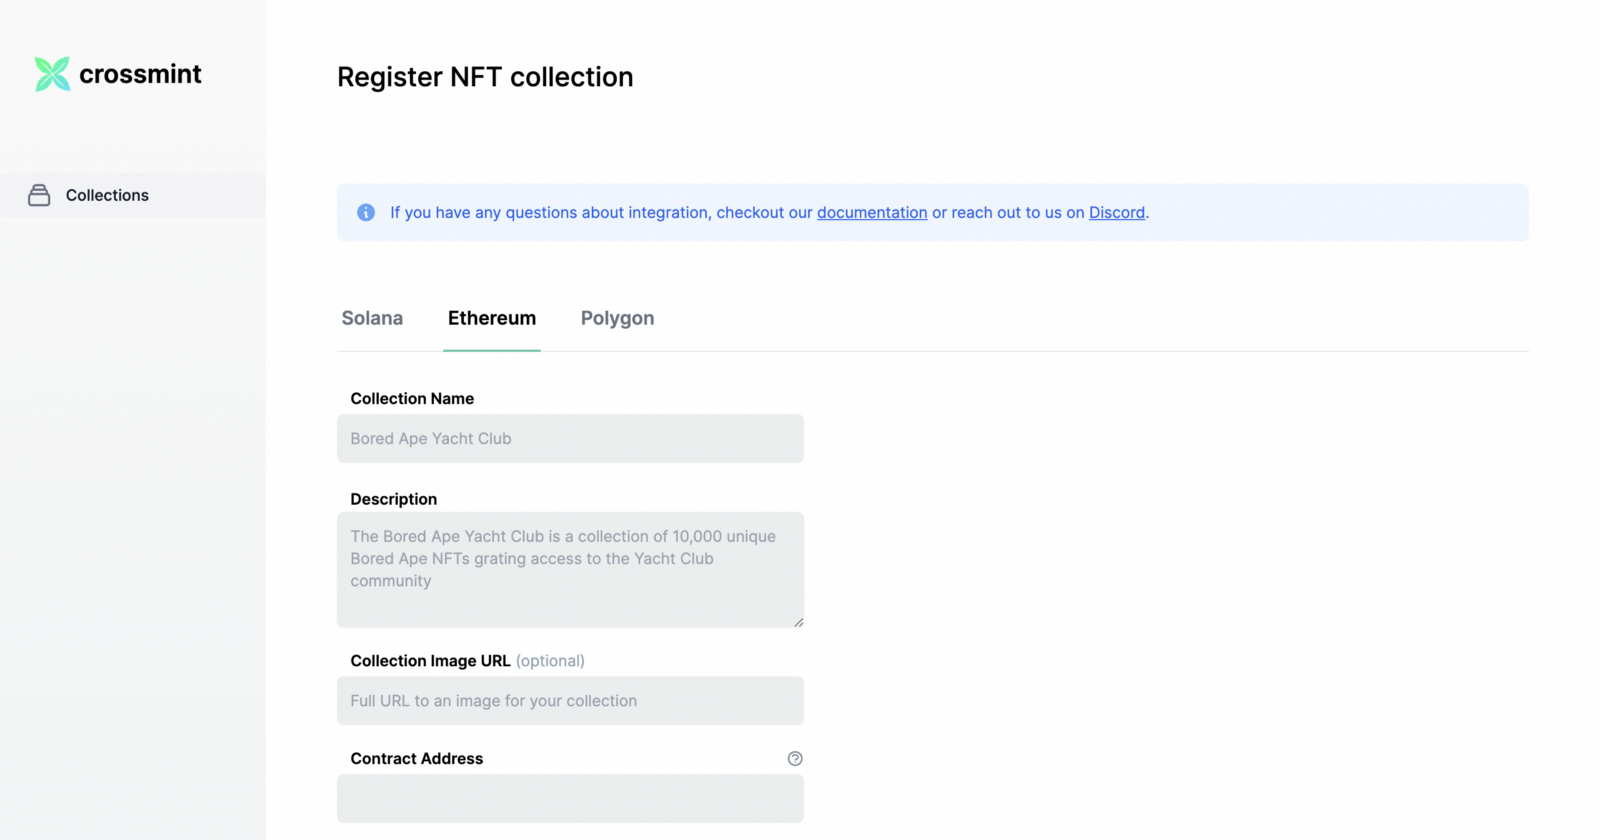
The contract address is the same one you entered into App.tsx. You’ll now have to enter it into the Contract Address section of the console.
Next, you’ll need to enter recipient for the NFT recipient address mint function argument because this is the name of our recipient argument.
Grabbing the abi section of your smart contract
You already grabbed the abi file for your smart contract for your front-end website.
We’re going to grab a very specific section of this file for Crossmint.
So open the GradientShapes.json file again that is in artifacts/contracts/MyGradientShapeNFT.json.
Inside of this file you’ll see a property, abi, that’s an array with various objects. You’ll need to grab the specific one that corresponds to the mint function you want us to call, and enter this into the Crossmint Developer Console.
You can find this one easily by searching for the minting function name, in this case mintNFT.
Next, grab the section that corresponds to the mint function you want Crossmint to call. The object below is the one we want to call, it contains all the function arguments and the type is function. In the example above case, it would look like this:
In our case it will look like this:
{
"inputs": [{
  "internalType": "address",
  "name": "recipient",
  "type": "address"
},
{
  "internalType": "string",
  "name": "tokenURI",
  "type": "string"
}],
"name": "mintNFT",
"outputs": [{
  "internalType": "uint256",
  "name": "",
  "type": "uint256"
}],
"stateMutability": "payable",
"type": "function"
}
Grab that whole object and paste it into the ABI text field on Crossmint.
Make sure there’s no trailing commas and the JSON is properly formatted.
Now click on Create Collection and if everything was done correctly, you should be redirected back to the main screen and see your collection there.
Integrating the Crossmint SDK into your minting website
Okay, now let’s get it working on our minting website! Watch how fast this is. There are only two steps necessary.
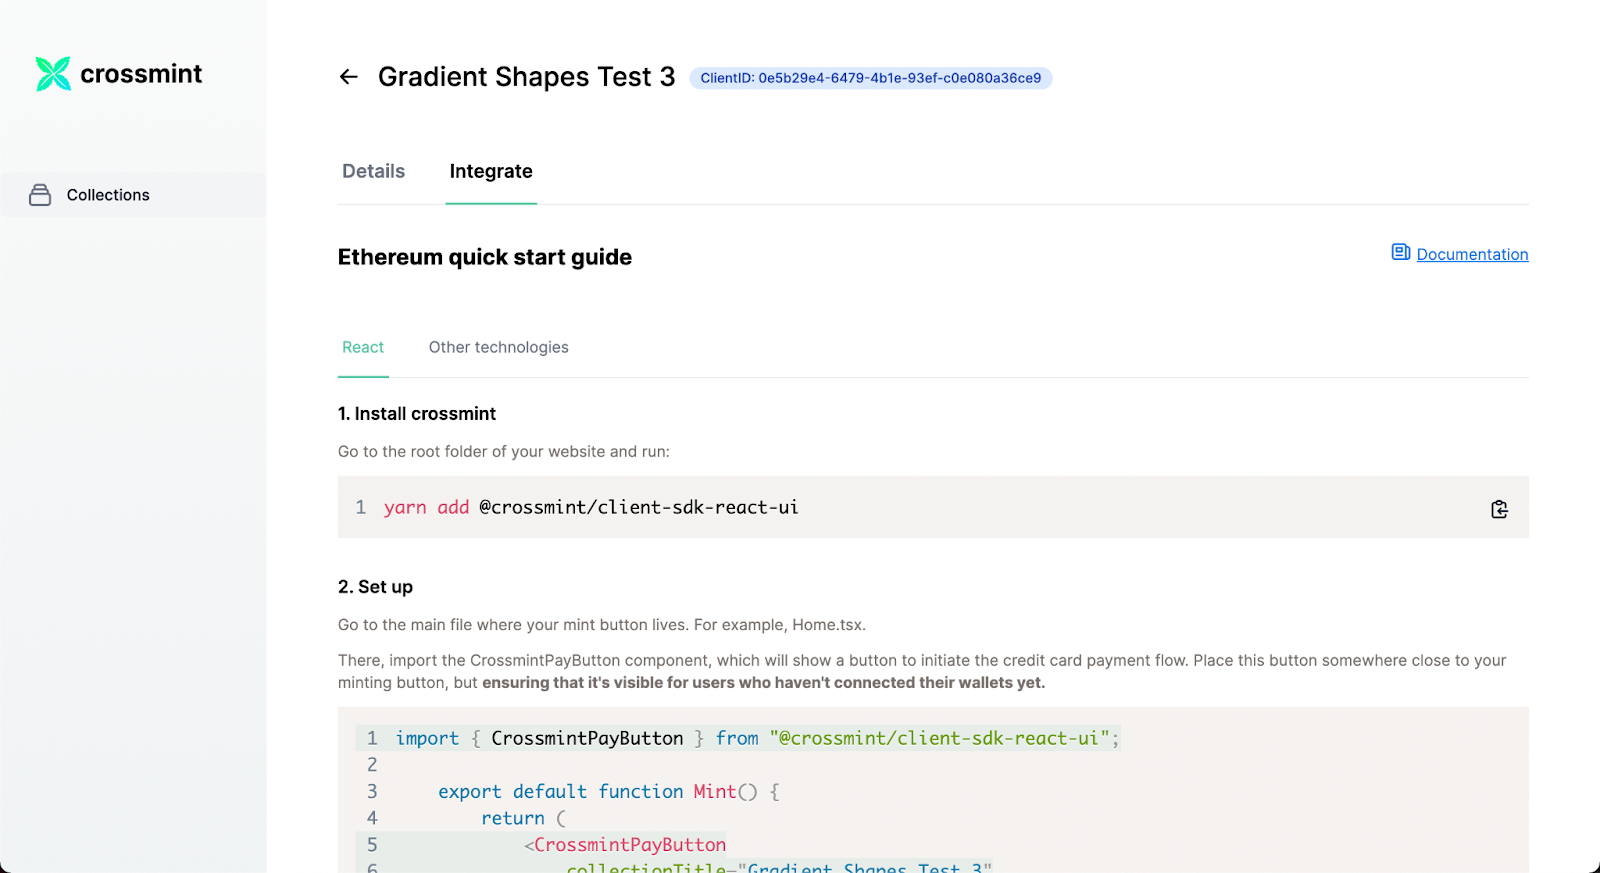
First, import the Crossmint button at the top of the file your App.tsx file.
import { CrossmintPayButton } from “@crossmint/client-sdk-react-ui”;The next step is adding the Crossmint button to your app. Visit the Integrate tab in the console. You’ll be presented with the code for the button. Grab this, making sure to only grab the CrossmintPayButton part and put it into your app.
There is one change that we need to make compared to the integrate section. We need to add a new property to the mintConfig attribute, which will contain our IPFS link, the actual NFT. It should look something like the following:
<CrossmintPayButton
 collectionTitle="<YOUR_COLLECTION_NAME>"
 collectionDescription="null"
 collectionPhoto="null"
 collectionId="<YOUR_COLLECTION_ID>"
 projectId="<YOUR_PROJECT_ID>"
 environment="staging"
 mintConfig={{
   "type":"erc-721",
   "price":"0.001",
   "tokenURI": tokenURI
}}
/>
Add that right below the <p> tag that contains the description or anywhere near there. Make sure that it’s visible even if the user hasn’t yet connected their Ethereum wallet.
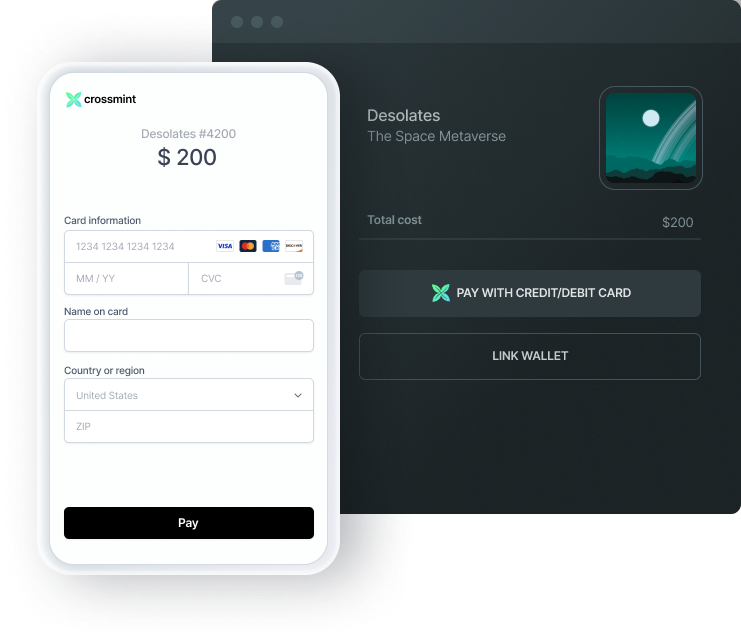
Make sure that you switch out the tokenURI at the top of the file to be one that you haven’t yet minted. Now when you click on the Crossmint button you’re gonna see
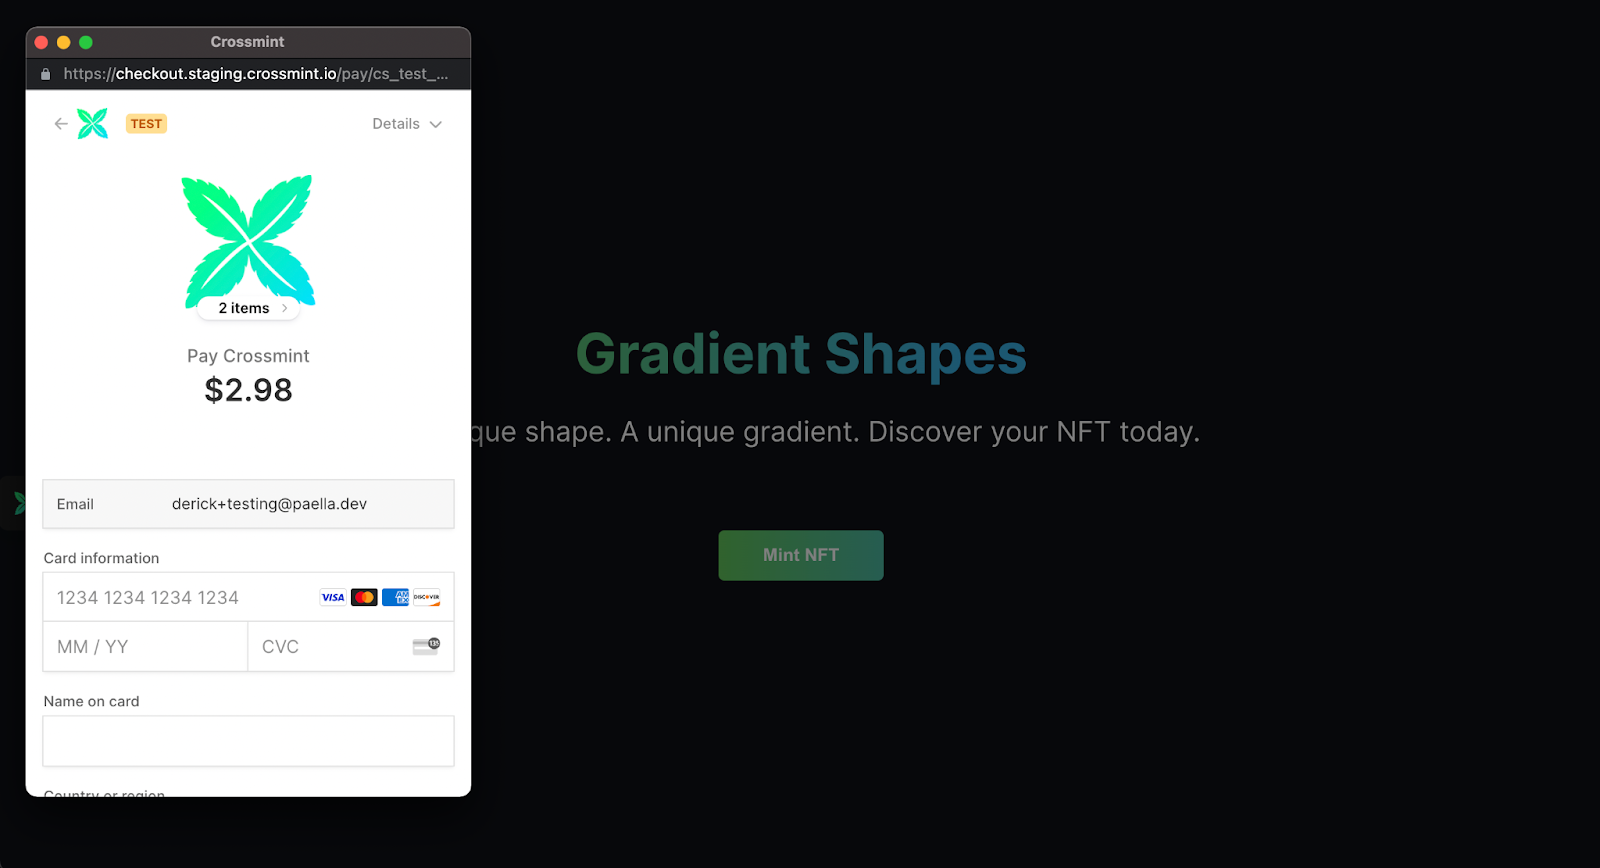
Go ahead and fill that form out with some test information. For example, 4242 4242 4242 4242. For the month and year put any future date, and any 3-digit code for the CVC number. Enter your name and now click on the pay button. After successfully minting, and you go back into your Staging Crossmint Dashboard, you should see your freshly minted NFT in your dashboard.
Conclusion
If you made it all the way to here then Great work! You created your first NFT drop on Ethereum’s Rinkeby testnet. You minted various NFTs using the console, a website, and finally using Crossmint. There’s still a lot more to do, for example, dynamically minting NFTs. We’ll touch on that in a future article.