


With just a Google Sheet, you can now mint your own NFTs without writing a single line of code in 5 minutes or less, thanks to the Crossmint NFT Minting API.
Create and Send NFTs easily
If you've been wanting to create your own NFTs (for your art, to gift the attendants of your event, for creating membership passes, or even just for fun) but don't have time or coding experience, Crossmint has you covered.
With just a Google Sheet, you can now mint your own NFTs without writing a single line of code in 5 minutes or less, thanks to the Crossmint Minting API.
All you need is a Crossmint account, an image hosted on the web, and a little creativity. And the best thing is: Crossmint takes care of delivery to your audience, even if they don’t have a wallet – just enter their email address and we take care of the rest. In this tutorial, we'll walk you through the step-by-step process.
Step 1: Crossmint Set Up
Before you can start minting NFTs, you'll need to create an account with Crossmint and generate your API keys. These are used to identify your project. We will first mint on staging, which is a free test version of the blockchain.
Follow these steps to get started:
- Go to staging.crossmint.com and click on “Dev console” at the top right
- Create an account or log in
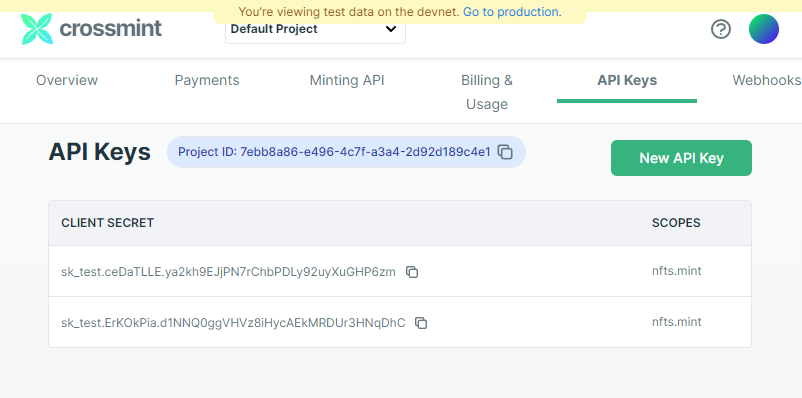
- Go to the “API Keys” tab and create a set of API keys with the 'nfts.mint' scope
- Click save and take note of the “client secret” as well as the “Project ID”. You will need them later.
Step 2: Open the Google Sheets Template
To get started, open the Crossmint Minting Template. Make a copy of the template by going to File > Make a copy. This will create a new copy of the spreadsheet that you can edit.
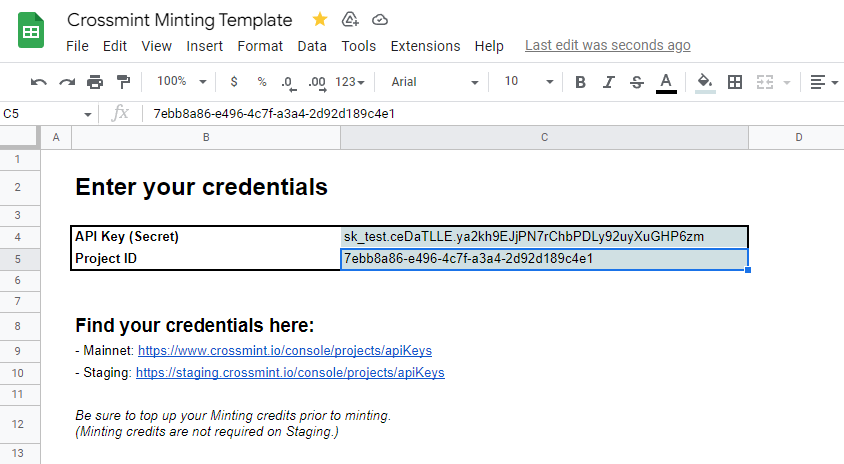
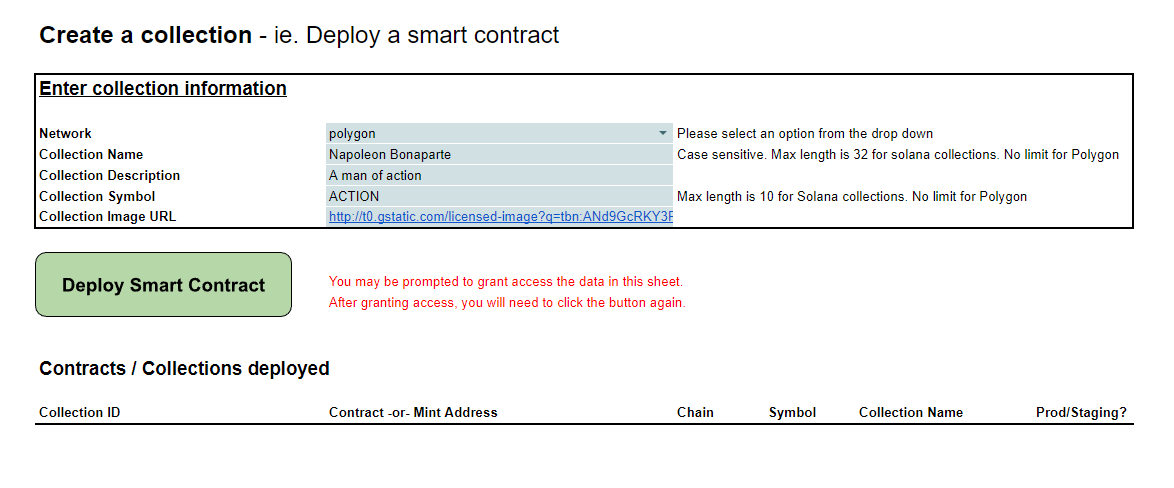
Step 3: Fill Out the Spreadsheet
Follow the instructions on the spreadsheet. It will walk you through the process of entering the API key information you obtained earlier, defining your collection metadata, creating your NFTs, and delivering them to your customers.


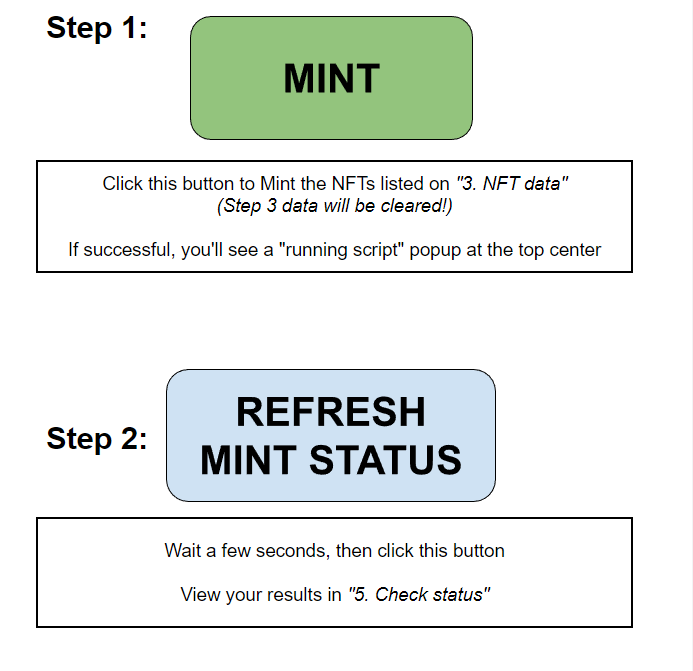
Step 4: Wait for Confirmation
After you've minted your NFTs, you'll need to wait for the blockchain to confirm them. This may take up to a few minutes, depending on the blockchain you selected. You can check this status by clicking on “Refresh mint status” in the sheet.
Once your NFTs are confirmed, they will be airdropped to the Crossmint wallet emails that you provided. Heads up: the people receiving your NFTs will not be notified! Be sure to find a way to let them know. They can view their NFTs at https://www.crossmint.com/user/collection.
That's it! With Crossmint, you can easily create your own NFT collection without having to write any code. We hope you find this tutorial helpful. If you have any questions or run into any issues, don't hesitate to reach out to our support team for assistance.
Conclusion
If you are ready to mint NFTs for real, follow the same steps above with a production account at www.crossmint.com instead. This time around, go to the “Billing” section, add a payment method, and fund your Crossmint account with some credits to get started. Mint your first NFT with less than $1.
Note: staging accounts are different from mainnet accounts, so you will need to sign up again.


